
Staining wood enhances its natural beauty by bringing out the depth of grain and color. But staining is only the first step. Applying the right protective finish is crucial for preserving your stained wood project and giving it a polished, professional look.
Whether you’ve stained a wood floor, furniture, cabinetry, or other project, this comprehensive guide will walk you through the essential process of finishing wood after staining.
Finishing Stained Wood Like a Pro: Key Takeaways
- Allow adequate dry time for stains before finishing, typically 48 hours.
- Lightly sand surfaces prior to finishing to smooth wood grain and prep for adhesion.
- Thoroughly clean surfaces of dust, oil or debris that could impair the finish.
- Select an appropriate finish for the wood type, desired look, use and application method.
- Polyurethane, lacquer, shellac, varnish, oil and wax are common options.
- Carefully apply finishes in thin, even coats following the manufacturer’s directions.
- Allow proper drying time between finish coats for smooth results.
- Maintain the finish by cleaning gently, using protectants, and reapplying fresh coats periodically.
Allowing Adequate Dry Time for the Stain
Before you can apply any type of finish to stained wood, it’s imperative that you allow adequate dry time for the stain. Most oil-based and gel stains require a minimum of 24 hours drying time. But 48 hours is even better to ensure the stain has fully cured.
Water-based stains generally dry more quickly, within 2-4 hours. Always check the manufacturer’s instructions for the recommended dry time for the specific stain you used.
Applying a finish too soon runs the risk of the stain bleeding or smearing, which can completely ruin the look you worked hard to achieve. When in doubt, allow extra dry time rather than risk ruining your project.
Here are some signs that your stained wood is ready for a protective finish:
- The surface feels dry to the touch, not sticky or tacky
- The color appears uniform, without any wet-looking spots
- Dust or debris can be brushed off without smearing the stain
If you see any tackiness, uneven coloring, or smearing, the stain needs more time to cure fully. Allow at least another 24 hours before testing again. Rushing this step can undo all your hard work.
Prepping the Surface with Light Sanding
Once the stained wood is completely dry, your next step is to lightly sand the surface. This serves a few important purposes:
- It smooths out any raised grain in the wood, which creates a more even surface for finishing.
- It removes any dust nibs or debris that may have settled on the surface as the stain dried.
- It roughs up the surface just slightly for better adhesion of the topcoat.
For best results, use fine grit sandpaper of 220-grit or higher. Anything more coarse can risk scratching through the stain. Gently sand in the direction of the wood grain, taking care not to bear down too hard. The goal is to smooth the surface, not remove the stain.
Pay close attention to areas like table legs or chair posts, where you’re most likely to encounter raised grain. Even if the rest of the surface feels smooth, sanding these areas will give you a flawless foundation for your finish.
When sanding is complete, wipe off any dust with a clean, dry cloth or use a vacuum with a brush attachment. Compressed air can also help blow away fine dust. Just take care not to blow it onto surfaces you’ve already sanded.
Cleaning Prior to Finish Application
After sanding, take time to thoroughly clean the sanded surface before applying any finish. Even the slightest dust or debris under the finish can ruin the look you worked so hard to achieve.
Use a clean, dry lint-free cloth to wipe down the entire surface. If any stain color comes off onto the cloth, that’s a sign you need to allow additional dry time before finishing.
For removing fine dust, you can also use a vacuum with a soft brush attachment. Avoid vigorous scrubbing or rubbing, which could pull up stain from the wood. Work systematically over the entire surface, moving the vacuum nozzle just above.
If the wood feels at all oily or greasy, wipe it down with a cloth dampened in mineral spirits, followed by a clean dry cloth. This removes any residual oils from sanding or handling the wood prior to finishing.
Once the surface is pristine, you’re ready for the exciting step of applying your finish!
Factors to Consider When Choosing a Finish
With the wide variety of finish options available, deciding on the best one for your particular stained wood project may seem daunting. But just keep these factors in mind:
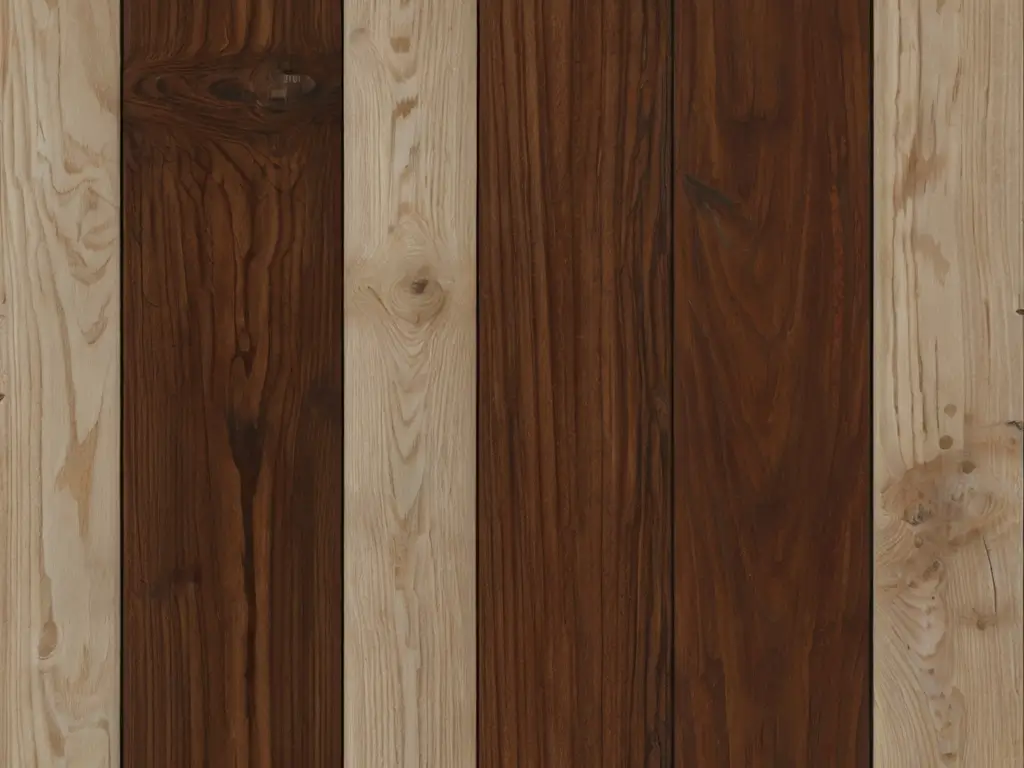
Type of Wood
- Softwoods like pine are porous and prone to dents and scratches. They benefit from a protective topcoat like polyurethane.
- Open-grained woods like oak or mahogany require a filler before finishing to avoid a “blotchy” look.
- Harder woods like maple and cherry can be finished with virtually any type of topcoat.
Desired Look
- Do you want a glossy shine or a subtle satin sheen?
- Is a natural, matte look more your style? Consider if the finish will enhance or take away from the stained wood.
Use and Durability
- What type of wear and tear will the finished piece endure? High-traffic floors and tabletops demand maximum durability.
- Finishes like wax or tung oil provide less protection for surfaces prone to spills, scratches, and dents.
Application Method
- Does the finish require any specialized tools or a high level of skill to apply? Opt for an easy-to-use finish if you’re inexperienced.
- Some finishes involve wiping or rubbing, while others require careful brushwork. Consider your comfort level.
Drying Time
- How long will you need to wait between finish coats? Some finishes take hours, others days. Plan your timeline accordingly.
- Are fumes or odor a concern? Water-based finishes involve less off-gassing.
Maintenance
- How much upkeep does the finish require to retain its beauty and protection?
- Some finishes need frequent polishing or re-coating while others are more hands-off.
Common Types of Wood Finishes
Now that you know what to consider when selecting a finish, let’s take a look at some of the most popular options for finishing stained wood:
Polyurethane
Polyurethane is arguably the most common finish for stained wood projects. Available in both oil-based and water-based formulations, polyurethane provides a clear, durable, protective coating.
Benefits
- Excellent durability and abrasion resistance
- Resistant to scratches, spills, and moisture
- Dries to a smooth, glass-like surface
- Enhances wood grain
- Oil-based provides a warm amber tone
Drawbacks
- Oil-based has strong odor and takes longer to dry
- Can yellow over time
- Requires 4-6 coats for optimal protection
- Brush marks may be visible
Polyurethane works well for both indoor and outdoor projects. Oil-based poly offers the most protection for tabletops, floors, and high-wear items. Water-based poly dries faster and has less odor, making it ideal for indoor furniture, cabinets, and trim.
Lacquer
Derived from the sap of trees, lacquer has been used for centuries to finish wood projects. Traditional lacquer contains toxic solvents, but water-based options are now available. Lacquer dries to a smooth, durable finish.
Benefits
- Very fast drying time
- Provides a super smooth finish
- Enhances depth of color
- Easy to apply and repair
Drawbacks
- Requires multiple coats for good protection
- Fumes require proper ventilation
- Susceptible to damage from heat or moisture
- Difficult for amateurs to achieve flawless results
Lacquer is valued for finishing cabinets, furniture, and other projects where a glass-smooth surface is desired. But the fumes make it less suitable for home use.
Shellac
Shellac is a natural resin secreted by the lac beetle. It produces a classic, mildly amber finish ideal for lighter woods. Due to its wax content, shellac doesn’t provide the most durable finish. But it accentuates the wood grain beautifully.
Benefits
- Enhances natural look of light-colored woods
- Dries very quickly
- Easy to apply
- Leaves a smooth finish
Drawbacks
- Not as protective or durable as other finishes
- Frequent reapplication needed for longevity
- Can water-spot and scratch easily
Shellac works well as a sealer or primer coat under other finishes. It brings out a soft glow in maple, birch, pine and other light woods.
Varnish
Varnish has been used for centuries to finish and protect wood. Traditional varnish is made from resins dissolved in oil. Newer water-based varnishes offer faster drying and less odor. While not as durable as polyurethane, varnish enhances the wood’s natural beauty.
Benefits
- Excellent moisture resistance
- Provides good durability for indoor use
- Minimal odor compared to oil-based finishes
- Available in various sheens
Drawbacks
- Not as protective as polyurethane
- Requires multiple coats for best results
- Can yellow over time
- Brush marks may be visible
The warm glow of varnish is ideal for indoor furniture, cabinets, trim, and woodwork. For outdoor projects, marine varnish offers maximum water and UV resistance.
Tung Oil
Obtained from the nuts of the tung tree, tung oil penetrates deep into the wood pores to provide a protective, lustrous finish. It is applied by wiping or rubbing the oil into the wood. Tung oil enhances the natural look of the wood grain.
Benefits
- Provides a natural, hand-rubbed look
- Enhances depth and richness of wood grain
- Offers moderate protection for indoor use
- Easy for beginners to apply
Drawbacks
- Multiple applications required for best results
- Not as protective as film-building finishes
- Frequent reapplication needed for longevity
Tung oil is ideal for finishing smaller indoor wood pieces like cutting boards, bowls, and utensils. It provides some protection while maintaining a natural look.
Danish Oil
Danish oils are popular blends of oil and varnish. They offer easy application like tung oil, but with more protection from the varnish content. Danish oil brings out a wood’s natural beauty with a hand-rubbed luster.
Benefits
- Enhances depth and richness of wood grain
- Offers moderate protection for indoor use
- Easy wipe-on application
- Provides a natural, low-luster finish
Drawbacks
- Not as protective as film-building finishes
- May require reapplication over time
- Can leave a tacky surface if over-applied
Danish oil is suitable for indoor furniture, cabinets, wood trim, and other projects where a natural, satin look is desired. It’s easy for DIY-ers to apply.
Wax Finish
Wax has been used for centuries to finish wood furniture. Wax finishes provide minimal protection, but bring out the wood’s inherent beauty. Wax also gives wood a pleasantly tactile feel.
Benefits
- Enhances natural look and feel of wood
- Subtle sheen, not overly glossy
- Easy application with cloth or brush
- Low odor and non-toxic
Drawbacks
- Minimal protection from scratches or spills
- Frequent reapplication needed
- Can water-spot if moisture gets beneath wax
Wax finishing is ideal for lighter woods where you want to showcase the natural color and grain. Use paste wax or a wood furniture wax to protect tables, chairs, picture frames and other lightly used pieces.
Application Tips for Common Wood Finishes
Now that you’re familiar with the most popular options for finishing stained wood, let’s go over some best practices for applying these finishes smoothly and flawlessly:
Applying Polyurethane
- Use a good quality natural bristle brush designed for polyurethane. Foam brushes can leave bubbles.
- Stir the poly gently before use to disperse solids – do not shake.
- Flow on thin coats using smooth brushstrokes, following the direction of the wood grain.
- Allow 2-3 hours between coats for oil-based, or 1-2 hours for water-based.
- Lightly sand between coats using 220-grit paper to ensure a glass-smooth finish.
- For optimal protection, apply 3-4 thin coats rather than 1-2 thick coats.
Applying Lacquer
- Lacquer shows all imperfections. Fill wood pores and sand surfaces silky smooth before applying.
- Use a high-quality natural bristle brush, foam brush, or spray application.
- Apply thin coats to avoid drips and runs. Too much lacquer can wrinkle or crack.
- Allow just 30-60 minutes between coats. Multiple thin coats build protection.
- Sand lightly with 320-400 grit paper between coats for an ultra-smooth finish.
Applying Shellac
- Freshly mixed shellac has a short pot life. Mix small batches.
- Apply a thin coat using a natural bristle brush or lint-free rag.
- Allow just 30-60 minutes between coats. 2-3 coats is generally sufficient.
- Adding wax to the final coat provides water resistance and a silky-smooth feel.
- Shellac can be recoated without sanding. This maintains clarity on fine projects.
Applying Varnish
- Use a quality natural bristle varnish brush. Foam brushes don’t level properly.
- Stir varnish gently before use and apply a thin, even coat.
- On vertical surfaces, apply bottom to top to avoid drips.
- Allow 6-8 hours between coats. Lightly sand between coats for a glassy finish.
- For protection, apply 3-4 coats of a satin or semi-gloss varnish formula.
Maintaining the Finish Over Time
Now that you know how to prep, apply, and finish stained wood beautifully, you’ll want to keep it looking its best. Here are some tips for maintaining the finish long-term:
- Keep the finished surface clean by dusting frequently and wiping up spills when they occur.
- Clean with a mild soap and water solution only. Avoid harsh cleaners which can strip the finish.
- Place felt pads under furniture legs and other accessories to prevent scratches.
- Use coasters, placemats and tablecloths to protect tabletops from hot items, spills, etc.
- Limit direct sun exposure which can cause finishes to fade or yellow prematurely.
- Apply paste wax or furniture polish periodically per the manufacturer’s instructions to clean and enhance the sheen.
- Watch for signs of wear like scratches or water marks and touch up or reapply the finish as needed.
With the right protective finish properly applied and maintained, your stained wood project can stay beautiful and durable for years of use and enjoyment!