
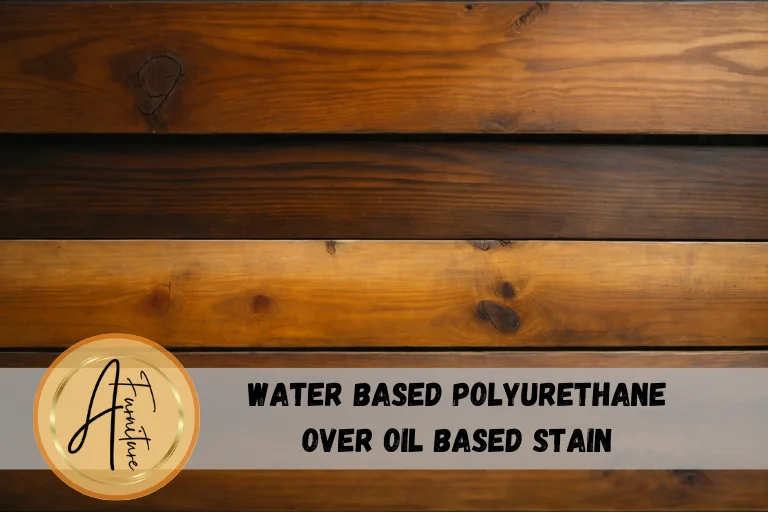
Polyurethane is a common protective finish used on wood projects to provide a shiny, durable coating. Oil-based polyurethanes have been popular for years, but recent innovations have improved water-based options. Many woodworkers now prefer using water-based polyurethanes because they dry faster, have less odor, and allow easier cleanup with soap and water.
However, one key question arises: can you apply a water-based polyurethane over an existing oil-based stain? The short answer is yes, you can. But there are some important steps to take for the best results. This comprehensive guide’ll cover everything you need to know about using water-based polyurethane over oil-based wood stain.
Overview of Oil-Based Stains
Before diving into the specifics of using water-based polyurethane, it helps to understand how oil-based stains work on wood.
Oil-based stains contain pigments suspended in an oil carrier, usually linseed or tung oil. When applied to bare wood, the pigments color the wood while the oil penetrates the grain. This gives a rich, deep coloration and accentuates the natural wood grain patterns.
Common oil-based stain types include:
- Penetrating stains – contain a high proportion of pigment to oil. They deeply color the wood.
- Wipe-on stains – contain less pigment and more oil. Subtler color, but still enhance grain.
- Gel stains – thick, pigmented gel that sits on the wood surface. Provides vibrant, consistent color.
Oil-based stains take longer to dry than water-based stains – usually 24-72 hours until fully cured. The oil needs to oxidize and chemically bond with the wood through cross-linking. This extended curing time is crucial to remember when applying a water-based finish on top.
Why Use Water-Based Polyurethane?
Water-based polyurethane finishes have gained popularity for several compelling reasons:
Faster drying time – Water-based polyurethane dries much more quickly than oil-based. This allows you to apply multiple coats in quick succession.
Low odor – Oil-based polyurethanes contain solvents that can be quite stinky. Water-based options have a much lower odor.
Easy cleanup – While oil-based finishes require mineral spirits, water-based polyurethanes can be cleaned with soap and water.
Environmentally-friendly – Water-based finishes emit far fewer VOCs (volatile organic compounds). Much less impact on indoor air quality.
Clear, protective finish – Water-based poly provides a crystal clear, smooth coating that protects and shows off the wood grain.
So if you already have a wood project stained with an oil-based product, using a water-based polyurethane on top gives you the best of both worlds – vibrant stain color plus fast-drying protective finish. But proper prep is crucial…
How to Prepare an Oil-Stained Surface for Water-Based Poly
Applying water-based polyurethane over an existing oil-based stain may seem counterintuitive. But with careful preparation, the two products work together extremely well:
1. Allow for proper drying time
This is by far the most critical factor. The oil-based stain must fully cure and cross-link with the wood before applying a water-based finish. If any residual oil remains, it can cause adhesion problems with the water-based poly.
Drying times vary based on environmental factors, but a good rule of thumb is 24-48 hours for most oil-based stains. Gel stains may take up to 72 hours. Check the manufacturer’s label for recommended drying times.
2. Sand lightly to smooth the surface
Once the stain has fully cured, lightly sand the surface using fine 220-320 grit sandpaper. This helps remove any dust nibs, fibers or dried stain droplets. Sand just enough to leave a smooth, uniform surface for the poly to adhere to.
3. Wipe down with a tack cloth
Use a lint-free tack cloth to wipe off any remaining dust after sanding. This removes contaminants that could affect the polyurethane finish.
4. Apply an isolation coat (optional)
Some expert woodworkers recommend applying a thin isolation coat of dewaxed shellac or sanding sealer before the water-based poly. This seals the oil-stained surface and prevents any potential adhesion issues. The isolation coat is not mandatory for most applications but provides extra insurance.
5. Do a sample test piece
Before committing your project to the full water-based finish, test on a scrap piece or inconspicuous area. Ensure proper adhesion and check that the poly does not cause any unintended color changes to the stained wood.
Once prepped, you are ready to proceed with applying the water-based polyurethane.
Tips for Applying Water-Based Poly Over Oil Stain
Follow these best practices for flawless results:
1. Use a good quality brush
Invest in a high-quality synthetic bristle brush. Nylon or polyester bristles hold their shape better than natural hair. Use a brush sized appropriately for your project – 2-3 inches for smaller items, up to 4-6 inches on wider surfaces like tabletops.
Avoid cheap foam brushes which can leave bubbles and an uneven finish.
2. Maintain a wet edge as you apply
To prevent lap marks, always maintain a wet edge as you progress. Work from one end of the board to the other without letting the finish begin drying in any area. If needed, have someone assist with this step.
3. Apply thin coats
Water-based polyurethanes look best applied in multiple thin coats. Thick single coats are more likely to bubble or cloud. The general rule of thumb is to apply 3-5 thin coats for furniture, and up to 7-10 coats for a hardwearing floor finish.
4. Sand lightly between coats
Using 320 grit sandpaper, do a light sanding between each coat of polyurethane. This helps remove any dust particles that settled into the finish and creates a smooth surface for the next coat to bond to. Be careful not to sand through the finish.
5. Avoid drips and sags
Apply the polyurethane in a controlled manner without overloading the brush. Water-based poly tends to drip or sag on vertical surfaces. Move the brush slowly and gently to spread the finish evenly.
6. Allow ample drying time
Drying times vary based on humidity and air circulation, but generally water-based polyurethane dries within 1-2 hours between coats. Oil-based takes 8-24 hours between coats. Remember that drying and curing are two different things – allow several days for the finish to cure before use fully.
7. Consider rubbing out the final coat
After the last coat has cured for a few days, “rubbing out” with extra fine steel wool and polishing compounds can eliminate dust nibs and create an ultra-smooth finish. Take this optional extra step if desired.
Potential Issues and Troubleshooting
Using water-based poly over oil stain usually proceeds smoothly, but here are solutions to a few potential problems:
1. Poor adhesion
If the finish easily rubs off, doesn’t harden, or seems tacky, poor adhesion is likely the cause. This happens if water-based polyurethane is applied too soon before oil-based stain has fully cured. Allow more drying time and reapply fresh coats.
2. Blotchiness
If the polyurethane dried unevenly over the stained wood, leaving a blotchy appearance, the stain surface may not have been smooth enough. Sand until uniformly smooth before reapplying polyurethane.
3. Cloudiness
Thick coats, excessive brushing, or shaking the can of poly can all create a cloudy hazy look. Use thin coats, a light touch while brushing, and avoid shaking the polyurethane container.
4. Bubbles
Foam brushes or overbrushing can lead to bubbles in the hardened finish. Use high quality brushes and apply poly gently without too many extra brush strokes.
5. Coloration Changes
In some cases, the water-based poly may slightly darken or change the color of the underlying oil-based stain. Test first on a scrap piece to ensure you are satisfied with potential color shifts.
Maintaining the Finish Over Time
Once your oil stain and water-based poly project is complete, a little bit of maintenance helps preserve its beauty:
- Use coasters under glasses and placemats under dishes to prevent water rings.
- Wipe up spills promptly to avoid any potential water damage.
- Dust frequently using soft microfiber cloths.
- Avoid harsh cleaners Over time, the water-based polyurethane finish may show signs of wear, especially on surfaces like kitchen and dining tables that get a lot of use.
Here are some tips for refreshing the finish:
Clean thoroughly – Use a wood cleaner made for polyurethane to remove any dirt, oils or debris from the surface. This ensures the new coat of poly will adhere well.
Sand lightly – If the finish feels rough or shows scratches, do some light sanding using 320-400 grit sandpaper. Be sure to wipe away dust afterwards.
Apply fresh poly coats – Apply 1-2 new thin coats of water-based polyurethane following the same process outlined earlier. This will renew the protective clear finish.
Consider switching products – If you want to change the look, switch to a different water-based finish like acrylic or varnish. As long as proper adhesion steps are followed, other water-based products are compatible.
Try an oil-based product – Switching to an oil-based polyurethane, varnish or lacquer provides a subtle amber tone. Adhesion can be achieved if thoroughly degloss and sand the existing water-based finish first.
Stain again if needed – If you wish to alter or revive the stained color beneath the polyurethane, you’ll need to completely strip the finish before re-staining and reapplying fresh polyurethane coats.
Address localized damage – For small areas of finish damaged or worn through, you can carefully sand and reapply polyurethane to those spots rather than the whole surface.
With proper care and maintenance, a finish of water-based polyurethane over oil-based stain can look beautiful for years before needing refinishing. Follow the tips in this guide to get the most durability and longevity from this classic woodworking combination.
Frequently Asked Questions
How many coats of water-based polyurethane should I apply over stain?
Most experts recommend 3-5 thin coats for furniture and 7-10 coats for floors. Allow proper drying time between coats.
Can I use a water-based stain under the water-based poly?
Yes, water-based polyurethane is fully compatible with water-based stains. Just follow the same preparation tips.
How long should I wait before using the finished piece?
The polyurethane can cure for 5-7 days before subjecting the surface to heavy use or moisture.
Do I need to sand between coats if I use a wipe-on polyurethane?
Wipe-on polyurethanes self-level and may not need sanding between coats. But for best results, light sanding is still recommended.
What sheen level of polyurethane should I use – gloss, semi-gloss or satin?
This depends on the desired look and use of the project. Gloss offers maximum protection for tabletops. Satin provides a subtle sheen that’s ideal for many furniture pieces.
Conclusion
The combination of vibrant oil-based stain and tough water-based polyurethane is a wood finishing duo that delivers the best options. By allowing proper drying time for the stain and following the expert application tips outlined here, you can reliably use water-based poly over oil-based stains with outstanding results for all your woodworking projects.