
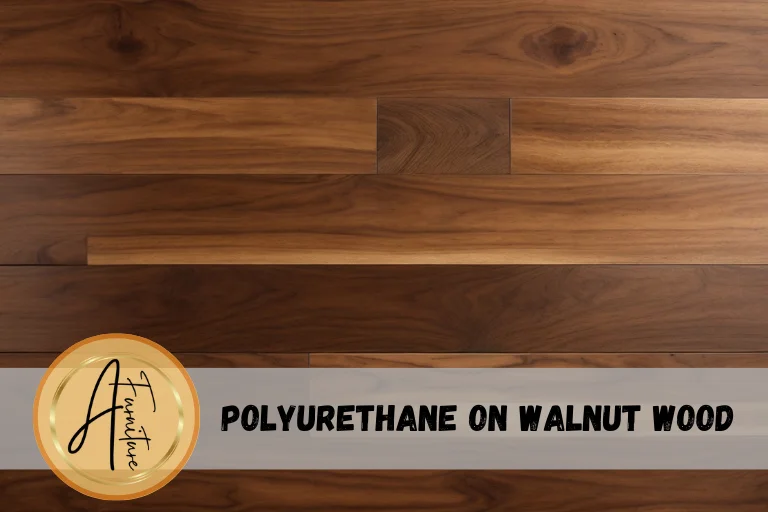
Walnut wood is treasured for its rich, warm brown color and beautiful grain patterns. When used to make furniture, flooring, or other wood projects, applying a clear finish helps protect the natural beauty of walnut while allowing its colors and texture to shine through.
Polyurethane is one of the most popular choices for finishing walnut wood. But is it the best option? This comprehensive guide examines the pros and cons of using polyurethane finishes on walnut.
An Introduction to Finishing Walnut Wood
Applying a clear finish to walnut serves several important purposes:
- Protection – Bare walnut is prone to scratches, water damage, and other wear. A finish creates a protective barrier to help the wood withstand everyday use.
- Enhancing natural beauty – The right finish enhances the rich brown hues in walnut and makes the flowing grain patterns stand out.
- Ease of cleaning – Finished walnut can be easily wiped with a damp cloth. Unfinished walnut requires more careful cleaning.
Oil-based finishes like tung and boiled linseed oil have been used centuries to finish and protect fine wood furniture. But modern advancements have led to new generations of finishes that are more durable and easier to apply.
Polyurethane is currently one of the most popular options for finishing walnut woodwork. But how does it stack up against other options? And is it the ideal choice for bringing out the best in walnut?
Understanding Polyurethane and Walnut Wood
To determine if polyurethane is the perfect match for walnut, it helps to understand the characteristics of each.
The Composition and Properties of Polyurethane
Polyurethane is a polymer coating created by chemical reactions between polyols and diisocyanates. The specific ingredients and ratios vary between formulations, creating finishes with different levels of durability, clarity, drying time, and other traits.
Advantages of polyurethane include:
- Highly protective – Forms a plastic-like coating over the wood that resists moisture, scratches, and chemical damage.
- Durable – Polyurethane bonds strongly to wood and hardens to create a finish that maintains its protective qualities over time.
- Enhances natural look – Clear polyurethane allows the wood’s color and grain to shine while providing a smooth, glass-like topcoat.
- Widely available – As one of the most common wood finishes, polyurethane can be found at any hardware store.
Potential drawbacks include:
- Difficult to repair – Fixing flaws or damaged areas requires stripping and reapplying the entire finish.
- Prone to yellowing – Oil-based polyurethane can develop a yellow/amber tint over time when used on light woods.
- Strong odor – Oil-based varieties have a potent odor during application that lingers as it cures.
- Toxic fumes – Applying and sanding polyurethane produces harmful VOCs that require proper ventilation.
The Unique Properties of Walnut Wood
Walnut wood is prized for its striking combination of color, grain patterns, and workability.
Key characteristics that make walnut wood popular include:
- Rich brown color – Ranges from chocolate brown to dark tan, developing a patina over time.
- Attractive grain – Has flowing, swirled grain patterns that add visual interest.
- Relative hardness – Walnut is strong enough for furniture but easier to work than exotic hardwoods.
- Finishing-friendly – Walnut generally has a straight, even grain for smooth finishing.
- Durability – Walnut wood stands up well to regular use with proper care and maintenance.
- Sustainably sourced – American black walnut is not an endangered species and is easily replenished.
Potential downsides of walnut include:
- Susceptible to dents – Softer than very dense exotic woods, so more prone to dings and scratches.
- Can stain easily – The porous structure absorbs spills readily without a protective finish.
- Color variations – Hues range from pale tan to chocolate brown within the same board.
- Expensive – Walnut lumber or veneer costs more than domestic woods like oak or maple.
With a balanced view of polyurethane and walnut’s characteristics, we can now compare how they interact as a finish and substrate.
Is Polyurethane the Best Finish for Walnut Wood?
Polyurethane has some clear advantages, making it a smart choice for walnut wood. But how does it compare to other finish options popular for walnut furniture, floors, and wood accents?
Polyurethane vs. Other Clear Wood Finishes
Shellac
- Derived from beetle secretions
- Requires multiple thin coats
- Easy to repair
- Prone to attracting dirt and moisture over time
Varnish
- Oil-based, similar to polyurethane
- Slightly softer and less durable
- Longer dry time between coats
- Amber tone enhances walnut’s brown color
Lacquer
- Fast drying convenience finish
- Provides moderate protection
- Susceptible to chipping over time
- Solvent fumes require ventilation
Oil finishes
- Penetrates wood pores rather than coating the surface
- Requires periodic reapplication
- Enhances natural color and grain
- Less protective than film-building finishes
Wax
- Provides minimal protection
- Must be periodically reapplied
- Enhances natural look of walnut
- Easy to apply and repair
Polyurethane offers better moisture resistance than traditional oil finishes or wax and is more durable than lacquer or shellac. While varnish provides comparable protection, polyurethane dries faster and resists yellowing better.
Expert Opinions on Polyurethane vs. Other Finishes
According to woodworking experts, polyurethane has pros and cons compared to other options:
- “For walnut’s richness, nothing beats the clarity of polyurethane,” says Jeff Jewitt of Home Repair Tutor. The thin film allows the depth of color and flowing grain to show through in a way oil finishes can’t match.
- “Polyurethane is the most practical choice for protecting walnut while showing its beauty,” Bob Flexner writes in Understanding Wood Finishing. “But occasional maintenance is required to keep the plastic-like film looking its best.”
- Craftsman Chuck Bender often chooses an initial coat of oil finish on walnut “to nourish the wood, followed by thin polyurethane topcoats for protection.” This combines the conditioning properties of oil with the durability of polyurethane.
While polyurethane has some downsides, its strengths in protection, clarity, and ease of application make it a top choice for finishing walnut compared to alternatives. But proper preparation and application are key to success.
How Polyurethane Changes the Color of Walnut
One advantage of polyurethane for walnut is its ability to enhance the wood’s natural color subtly. But the results vary based on preparation, number of coats, and other factors.
Polyurethane Enriches Walnut’s Brown Hues
The thin, clear polyurethane film over walnut creates an optical effect that intensifies its colors. Much like applying a glossy varnish, the finish refracts light to make the wood appear richer and warmer.
According to woodworker Michael Pekovich, this color-enhancing effect results from “the long-chain molecules in polyurethane that bend and focus light.” The result is a vibrant, saturated brown that seems to glow from within the grain patterns.
The color enrichment is especially noticeable on paler boards with tan hues. The polyurethane lends a caramel warmth, allowing the lighter tones to show through. On wood with existing red tones, polyurethane intensifies a reddish cast.
Staining the Poly for Extra Color Control
The polyurethane can be tinted to the desired shade for more predictable colour results. Popular options include:
- Walnut-hued stains – Adding a touch of brown pigment creates a finish that enhances walnut’s natural color. Multiple coats build the tone.
- Amber tints – Similar to how oil finishes warm up walnut’s color, amber-tinted polyurethane shifts hues toward red-brown.
- Dark and light custom colors – Polyurethane can be mixed with oil-based stains in any shade from ebonized black to a rich honey tan.
Whether the polyurethane is tinted or untinted, testing on scrap wood is essential to confirm the look before finishing the final project. The color results can vary based on the natural tone of the walnut boards.
Pros and Cons of Using Polyurethane on Walnut
Polyurethane has clear benefits for protecting walnut and enhancing its aesthetic appeal. But the finish also has some potential drawbacks to weigh.
The Benefits of Polyurethane on Walnut
Outstanding protection – Polyurethane forms a durable seal over walnut that prevents damage from moisture, spills, and impact. Walnut furniture and floors stay beautiful with minimal wear.
Enhances natural beauty – The clarity of polyurethane allows walnut’s flowing grain and varied brown tones to show through while lending a polished glow.
Easy application – Polyurethane goes smoothly by brush, rag, or spray. Thin coats prevent drips, runs, or brush marks.
Minimal maintenance – Unlike finishes like oil or wax, polyurethane doesn’t require frequent reapplication when properly cured.
Odor-free water-based options – Water-based poly dries fast without harsh fumes, making it ideal for indoor use.
Potential Drawbacks of Polyurethane on Walnut
Prone to ambering over time – Oil-based polyurethane can develop a yellowish tint, especially with exposure to sunlight. This shifts walnut from brown to red-brown.
Difficult to touch up – Fixing flaws or damage requires stripping the finish and starting over. This can damage the surrounding area.
Toxic fumes during application – Oil-based polyurethane requires proper ventilation during drying to avoid inhaling hazardous VOCs.
Risk of blotchiness on walnut – Applying polyurethane too heavily can create dark, uneven areas on walnut’s porous surface.
Highlighting color variations – Walnut’s natural color variations from board to board or within a single plank are emphasized under the clarity of poly.
Overall, polyurethane’s protective strengths outweigh its potential drawbacks for most walnut projects. Proper application techniques help minimize any downsides.
Using Polyurethane on Walnut – Indoor vs. Outdoor Projects
While polyurethane excels at protecting walnut inside the home, exterior uses require special considerations.
Polyurethane Walnut Furniture for Indoors
Polyurethane is an excellent choice for finishing walnut furniture, cabinets, and accent pieces intended for indoor use:
- Provides excellent scratch, moisture, and stain resistance from regular household use
- Enhances and warms up walnut’s rich natural tones
- Oil-based poly ambering over time blends nicely with walnut’s aging patina
- Modern water-based polys offer convenience for indoor projects
Indoors, walnut furniture finished with polyurethane can last for decades with minimal wear as long as the film finish remains intact. Dusting and gentle cleaning preserve its clarity and luster.
Using Polyurethane on Outdoor Walnut Projects
While standard polyurethane breaks down quickly in sunlight and weather, specialty exterior polyurethane is formulated for outdoor furniture:
- It contains UV inhibitors that resist yellowing from sun exposure
- It provides excellent protection from rain, snow, and other moisture
- Flexible resins prevent the finish from cracking as wood expands and contracts
- Multiple coats provide a thick, durable film to shield walnut
For a handsome aged look on outdoor walnut furniture, many woodworkers apply an oil finish first, followed by exterior polyurethane topcoats. This combines the patina-building properties of oil with polyurethane’s weather resistance.
Polyurethane Application Techniques for Walnut
Proper application is key to achieving an optimal polyurethane finish on walnut. Technique affects the final look, durability, and overall success.
Recommended Coats for Walnut
- Oil-based poly – 3-5 thin coats for furniture, up to 7 coats for floors
- Water-based poly – 4-6 coats
- Wipe-on poly – At least 4-6 wiped coats
- Exterior poly – 6-10 coats minimum
Thinner layers of approximately 1-2 mils allow the polyurethane to fully cure and bond properly. Heavier applications can lead to uncured areas beneath the surface.
Application Methods
Brushing – Use a high-quality natural bristle brush. Avoid foamy brushes which cause bubbles. Maintain a “wet edge” and brush with the grain.
Wiping – Apply a thin coat with a clean rag, then wipe again lightly with a second rag before the finish becomes tacky.
Spraying -Requires precautions against overspray but creates an exceptionally smooth finish. Thin the polyurethane slightly with the manufacturer’s recommended solvent.
Paint pad applicator – Provides smooth results like a brushed finish. Use light pressure and apply thin coats.
Test different application methods on scrap wood to find the approach that provides the desired look.
Choosing Satin, Gloss, or Semi-Gloss Polyurethane
Gloss – Enhances depth of color, ideal for accents. Shows imperfections.
Satin – Provides a soft luster with a smooth, natural look. Hides flaws well.
Semi-gloss – Strikes a balance with medium reflectivity.
For walnut furniture, many experts recommend satin sheen for an attractive luster without being overly glossy.
Preparing Walnut Wood for Polyurethane
Skillful preparation is essential for the poly to adhere properly and avoid blotchiness or other flaws:
Sanding Between Coats
Lightly sanding between coats of polyurethane allows each fresh layer to bond tightly. Use fine 220-320 grit sandpaper for a smooth foundation.
Sanding after the final coat with ultra-fine 400-600 grit removes minor imperfections like dust nibs or orange peel texture. Use a sanding block to prevent rounding edges.
Sanding with the Wood Grain
Always sand walnut along the direction of the grain, never across it. This maintains an even surface texture and prevents scratches from telegraphing through the finish.
Filling Pores
Using wood filler to plug walnut’s open pores results in a smooth, mirror-like polyurethane coating. However, this disguises the natural texture. Leaving pores unfilled preserves a tactile wood feel.
Accounting for Grain Direction
Due to variations in open and closed grain, apply thin coats of polyurethane slowly with the wood grain to prevent drips or blotching.
Proper sanding and accounting for walnut’s grain patterns are key preparatory steps to a flawless polyurethane finish.
Timing and Curing Considerations
Polyurethane cures through a chemical reaction that requires sufficient drying time between coats. Rushing the process can ruin the final result.
Drying Time Between Coats
Oil-based polyurethane requires 24 hours drying time between coats – 48 hours in cooler or humid conditions. Water-based varieties can be recoated after 2-3 hours. Insufficient drying causes uncured areas and adhesion problems.
Curing to Lock in Durability
It takes approximately 2 weeks for polyurethane to cure enough for regular use and maximum durability fully. The curing process continues for 30 days. Avoid placing heavy objects on the surface or cleaning with anything but a soft dust cloth during this period.
Factors Affecting Dry/Cure Time
- Temperature – Colder environments double or triple drying time.
- Humidity – High humidity inhibits evaporation, slowing the cure.
- Ventilation – Good airflow accelerates curing.
- Number of coats – More layers require longer total cure time.
Patience is a virtue with polyurethane. Allowing proper dry and cure times ensures the hardness and durability of the finish.
Oil-Based vs. Water-Based Polyurethane
Polyurethane is available in both oil-based and water-based formulas. Each has pros and cons to weigh for finishing walnut:
Oil-Based Polyurethane
Benefits
- More moisture resistant
- Higher heat tolerance
- Enhances walnut’s natural richness
Drawbacks
- Strong solvent fumes
- Longer drying time
- Prone to yellowing over time
Water-Based Polyurethane
Benefits
- Low odor and VOC emissions
- Short drying time between coats
- Resists yellowing better
Drawbacks
- Weaker moisture resistance
- Susceptible to clouding from moisture
- Less durable finish than oil-based
For most indoor walnut projects, water-based poly offers excellent clarity with less hassle. Outdoor furniture benefits from oil-based poly’s superior weather resistance.
Testing samples of both types allows choosing the best polyurethane formula for the specific application.
Long-Term Care and Maintenance of Polyurethane Finishes on Walnut
A polyurethane finish can last for years on walnut wood if properly maintained. But at some point, renewal is needed to keep the wood looking its best.
Refinishing Walnut with Polyurethane Over Time
With heavy use, polyurethane finishes eventually become scratched, dull, or worn in high traffic areas. Refinishing is then required to restore protection and luster.
When to refinish walnut:
- Finish is extensively marred or worn through to bare wood
- Sheen has become dull, scratched, or hazy rather than clear
- Noticeable whitish areas indicate moisture under the finish
- New walnut has been added that doesn’t match existing finish
Refinishing process:
- Lightly sand the existing finish to roughness.
- Wipe away sanding dust.
- Apply 2-3 fresh coats of polyurethane over the old finish.
- Allow proper drying and curing time before use.
Cleaning and Caring for Polyurethane on Walnut
Regular dusting with a dry microfiber cloth or dust mop keeps polyurethane on walnut looking freshly applied.
Occasional cleaning with a damp cloth removes minor dirt and residue. Use a mild soap and water solution, but avoid abrasive cleaners.
Polishing brings back luster between refinishing. Use a furniture polish containing carnauba or beeswax and buff lightly with a soft cloth.
Protecting the finish with felt pads under objects prevents scratches. Lift rather than drag items across the surface.
By keeping polyurethane-finished walnut free of dirt and grime, the wood retains its warm glow and smooth feel longer before needing refinishing.
Conclusion
Walnut wood projects deserve a finish that protects the work while enhancing the wood’s rich color and alluring grain patterns. Woodworkers commonly choose polyurethane for these reasons.
With proper preparation, application, and maintenance, polyurethane seals, preserves, and accentuates walnut’s natural beauty indoors and out. While no finish is perfect, polyurethane’s strengths make it a top choice for showcasing walnut’s distinctive traits.
By understanding polyurethane’s interaction with this prized wood, artisans can finish their walnut creations to maximize durability while drawing out walnut’s full visual splendor. With care and patience, a polyurethane finish allows future generations to enjoy the woodworker’s artistry.