
Alder wood is a popular choice for DIY and professional woodworkers alike. It’s affordable, readily available, and easy to work with. However, many find that staining alder wood can lead to frustrating, blotchy, and uneven results. This is largely due to alder’s soft, open-grain structure and lack of natural tannins. But with the right preparation and techniques, you can achieve beautiful, consistent stains on alder projects.
This comprehensive guide will cover the main challenges of evenly staining alder and proven solutions to help you get professional results. You’ll learn the importance of proper sanding, using conditioners and sealers, wipe-on gel stains, applying multiple thin coats, and more. We’ll also provide tips on enhancing alder’s natural grain patterns and mimicking pricier wood species like cherry or walnut.
Equipped with this knowledge, you’ll be able to tame alder’s wild grain and get flawless, uniform stains that properly showcase the wood’s beauty.
Key Takeaways:
- Alder is difficult to stain evenly without proper preparation
- Applying a wash-coat or sanding sealer before staining helps prevent blotchiness
- Properly sanding the alder wood before staining helps the stain penetrate evenly
- Gel stains or wiping stains work better than liquid stains on alder
- Stirring the stain well before applying helps maintain color consistency
- Alder can be stained to resemble other wood tones like oak, cherry, and walnut
- Consider a distressed or weathered stain look for an intentionally uneven finish
- Multiple thin coats of wiping varnish/polyurethane provide protection and sheen after staining
- Taking time with prep and testing leads to the best staining results on alder wood
Why Alder Poses Staining Challenges
To understand why alder can be problematic to stain, it helps to first look at its unique physical properties:
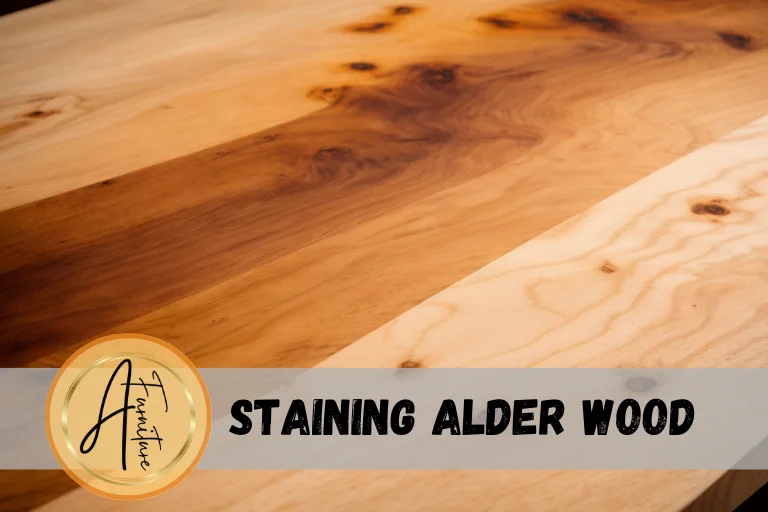
- Soft, open grain – Alder has large, open pores in its grain structure. This allows stain to absorb very quickly and unevenly. The soft earlywood absorbs more stain than the denser latewood, creating a blotchy appearance.
- Lack of tannins – Most wood contains tannins, which help regulate stain absorption. Alder lacks these natural chemicals, causing uneven absorption and blotchiness.
- Pale color – Alder’s light tan hue provides little base color for stains to build on. Stains can easily overwhelm and discolor the wood.
- Prone to oxidation – Alder reacts readily with oxygen, causing the wood to darken or yellow over time. This unpredictable oxidation impacts stain absorption.
These innate wood properties make it difficult for stains to penetrate and color alder evenly. But understanding what causes staining challenges is the first step to overcoming them.
Effective Pre-Staining Preparation
Careful prep work is crucial for even stain penetration and uniform coloring on alder. Here are some important steps to take before applying any stain:
Proper Sanding
Thorough sanding creates a smooth surface, allowing stain to penetrate the wood evenly. For alder, it’s recommended to sand up to at least 220 grit before staining. Pay close attention to the direction of the wood grain when sanding to avoid creating dark streaks than can show through the stain.
Remove all dust with a tack cloth after the final sanding. Leftover particulates can create barriers and uneven absorption. Proper sanding takes time but is one of the most vital steps for blotch-free staining.
Grain Filler (Optional)
A thin grain filler can help even out alder’s porous surface before staining. Apply a thin coat with a cloth and wipe off any excess. Once dry, lightly sand to ensure a smooth surface. Grain filler improves consistency but is not required.
Wash Coat or Sealer
Applying a sealant or wash coat is highly recommended when staining alder. These provide a barrier layer that regulates absorption so the wood doesn’t absorb stain too quickly. Common options include:
- Dewaxed shellac – Thinned with denatured alcohol to a 1-lb. cut
- Sanding sealer – Thinned oil-based varnish or water-based polyurethane
- Wood conditioner – Specially formulated to limit absorption
Apply a thin, even coat and let it fully dry. Lightly sand before applying stain. The wash coat prevents uneven blotching so the stain colors evenly.
Staining Techniques and Tips for Alder
Once your alder project is properly prepped, it’s time to select a stain and application method. Here are some best practices to follow:
Wiping and Gel Stains
Penetrating liquid stains are prone to uneven absorption on soft woods like alder. For best results, use a wiping stain or gel stain instead. Wiping stains have more pigment and less vehicle than liquid stains. This allows for better control over color depth.
Gel stains are thickened to maximize pigment on the surface while limiting penetration. This prevents uneven absorption. Apply gel stains in thin layers using a foam brush or cloth, wiping away excess for uniform coloring.
Multiple Thin Coats
Rather than one heavy application, build up color gradually with multiple thin coats of gel stain. This allows you to control the tone better and enhances even absorption. Add more coats until you achieve your desired shade. Allow each coat to dry fully before adding another.
Stain Conditioner Layer
You can further regulate absorption by applying a stain controller product before staining. These act like a wash coat but are specifically designed to restrict uneven penetration of stains. Use them in between sanding and your first stain coat.
Test on Scraps
Always test your chosen stain brand, color, and application method on an alder scrap or hidden area. This shows how the stain reacts and allows you to adjust your technique before committing to the full project. Testing helps avoid surprises and shows if adjustments are needed.
Enhancing Alder’s Grain for Staining
Bringing out alder’s attractive grain patterns can add visual interest before applying stains. Here are some simple techniques:
Wetting the Wood
Misting the bare alder lightly with water reveals the grain by swelling and lifting the soft fibers. Allow to dry before sanding and staining for enhanced grain fully.
Using Wood Conditioner
In addition to regulating absorption, wood conditioners bring out the natural grain variations in alder. Let it soak in according to product directions.
Grain Raising
Using a special liquid like glycerin, wetting alder raises the soft grain slightly. When dry, gently sand the surface which cuts the grain more deeply. This enhances the grain pattern.
Wood Bleaches
A light bleach solution pulls color from alder to create greater contrast between earlywood and latewood. This accentuates the grain before applying stain.
Mimicking Other Wood Species with Stain
Alder’s neutral tone provides a blank canvas for transforming it into various faux wood species using stains. Here are some examples:
Cherry Stain
Use a cherry or red mahogany stain with reddish-brown undertones to mimic cherry. Add multiple coats to build rich color depth. Finish with a satin poly.
Walnut Stain
Walnut stain adds warmer brown colors with hints of red to emulate real walnut. Use a dark walnut gel stain for greater control and follow with a clear semi-gloss finish.
Mahogany Stain
For a classic reddish mahogany tone, apply a mahogany wiping stain. Increase redness with additional coats. Top with high gloss varnish.
Weathered Gray Stain
Create a driftwood look with white, gray, and charcoal stains. Wipe away stain in places to mimic worn spots. Top coat with a flat clear finish.
Always test different stain colors on sample wood to get the look of your desired species before committing to a full project. The right combination of prepare, staining, and protection can give affordable alder the elegance of exotic woods.
Applying Protective Top Coats Over Stains
The final step is applying a clear protective finish over the stained alder. This locks in the color and creates a smooth, durable outer layer. Consider these options:
Polyurethane
Oil-based poly provides the highest protection for heavy-use items like tables or floors. Use a satin or semi-gloss sheen. Allow sufficient drying time between multiple coats.
Water-Based Finishes
Water-based polycrylics offer easier cleanup and low odor compared to oil-based. They provide good protection for lighter use pieces. Allow proper drying between coats.
Wipe-On Polyurethane
Wipe-on poly applies easily with a rag for smooth, even coverage. It prevents drips or brush marks compared to regular polyurethane brushed on. Best for small surfaces.
Lacquer
Lacquer dries quickly and gives an ultra smooth finish. Use spray lacquer for efficiency on larger surfaces like cabinets or wardrobes. Apply thin coats to prevent drips or runs.
Shellac
Shellac adds a classic warm glow over alder stain. Use a 2-lb cut shellac thinned 50/50 with denatured alcohol. Multiple thin coats provide depth and protection.
Troubleshooting Blotchy Stain Results
Sometimes even with proper preparation, alder stain can still turn out uneven and blotchy. Here are some potential remedies:
- Sand the surface with fine grit sandpaper to remove blotchy areas and even the color. Reapply stain in thin coats.
- Use wood bleach to lighten discolored areas. Rinse thoroughly and allow to dry before restaining.
- Try a darker restaining which can help mask minor blotchiness. Add pigment paste to gel stain for more color control.
- For large dark spots, use oxalic acid or a commercial wood brightener. This pulls out excess pigment from the deeper pores. Rinse completely and allow to dry before restaining.
- You may need to strip the wood and start over in severe cases. Use a chemical stripper or sand down to bare wood. Properly prep and seal the bare wood before applying stain again.
- Apply a glaze over the stained surface to help blend and even out the color variation. Wipe on and off for subtle control over color and tone.
- Try using stains similar to the underlying color on finished pieces to help camouflage blotches. Adding gray tones helps neutralize discoloration.
- Test and adjust your staining process on scraps for future projects to get it right before committing to the full piece. Take notes on what works to replicate it.
- Talk to experienced woodworkers to learn more tricks for getting consistent results staining alder. There are often simple solutions to improve technique.
While staining alder evenly takes skill and patience, don’t be intimidated to try it on your next woodworking project. Following the preparation, application, and troubleshooting tips above will give you the knowledge to overcome the challenges of blotchiness. With practice, you’ll get professional staining results that properly accentuate the beauty of the wood. That first success will give you the confidence to take on more alder projects and expand your abilities.
Frequently Asked Questions
What are some common mistakes people make when staining alder?
Some common mistakes include not sanding thoroughly enough, using the wrong type of stain, applying too heavily, failing to use a conditioner or sealer, and lacking patience with multiple thin coats. Always test on scrap wood first.
What grit should I sand alder to before staining?
For the smoothest possible surface, sand alder up to 220 grit before staining. Some experts recommend up to 320 grit for ultra fine results. Remove all dust before sealing and staining.
Can I use a water-based stain on alder?
Water-based stains tend to sit more on the surface rather than penetrating evenly. For best results with alder, use an oil-based gel stain penetrating deeply and evenly for uniform coloring.
How many coats of stain should I apply?
For the most consistent, blotch-free look, apply at least 2-3 thin coats of gel stain rather than one heavy coat. This allows you to build to the desired color depth gradually.
What finish should I use to protect stained alder?
An oil-based wiping polyurethane provides the best protection for stained alder projects. Apply at least 3-4 thin coats for a durable, smooth finish that enhances the wood’s beauty.
Can I use a dark stain to hide blotches on alder?
One strategy is to use a darker espresso, walnut, or ebony stain, which helps mask minor blotchiness. Allow each coat to fully dry before evaluating if additional coats are needed.
How do I remove a blotchy stain job from alder?
Use chemical wood stripper to remove the failed stain, then sand with fine grit paper to smooth the bare wood. Properly seal and re-stain using the techniques in this article for improved results.
What are some tips for staining alder to look like cherry?
Use a cherry or red mahogany wiping stain with strong reddish-brown undertones. Apply at least 3-4 thin coats to build rich color depth. Finish with a satin wipe-on polyurethane for sheen.
Can I bleach or lighten alder before staining?
Wood bleach helps lighten alder and create starker contrast between the porous earlywood and dense latewood. This accentuates the grain before applying stain.
Conclusion
Staining alder wood evenly can be challenging, but with proper preparation and techniques, it is possible to achieve a desired finish. Applying a wash-coat or sanding sealer, sanding the wood properly, using gel or wiping stains, mixing the stain well, and testing samples are all important steps to ensure an even stain on alder. Additionally, considering a distressed or weathered stain look and applying multiple thin coats of varnish or polyurethane can enhance the final result. Taking time and patience during the process will yield the best staining results on alder.