
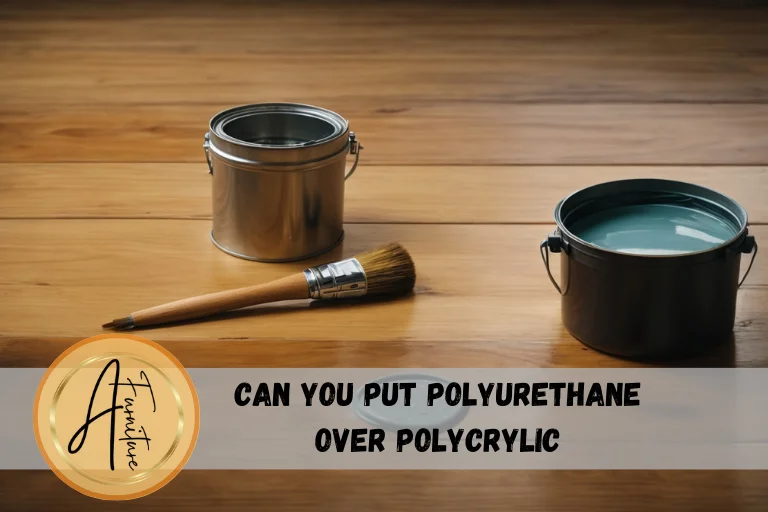
Whether you can put polyurethane over polycrylic is a hot topic among woodworking lovers and DIY enthusiasts. If you want to add extra protection to your wooden furniture or crafts, you’re in the right place.
Yes, you can apply both water-based and oil-based polyurethane over polycrylic. Whether you’re going straight for it or doing some prep work first, polyurethane offers a more robust layer of protection, acts as a waterproof seal, and is generally more durable than polycrylic. But, as with most things in life, the devil is in the details. So, let’s dive in.
Why Would You Do This?
There are a few key reasons why applying polyurethane over polycrylic can be beneficial:
1. Enhanced Durability
Polyurethane is known as one of the most durable finishes for wood. It forms a protective coating that can withstand everyday wear and tear of furniture and household items. Polyurethane has excellent abrasion resistance, so it doesn’t scratch or scuff as easily as other finishes like polycrylic. Adding a coat of polyurethane over polycrylic significantly boosts the durability, making your wood projects last even longer. It’s like the superhero cape for your wooden pieces!
2. Waterproofing
Polyurethane forms an impenetrable moisture barrier on the wood surface. This waterproof seal prevents water damage and stains. So if you’re worried about drinks getting spilled on your dining table or humidity warping your DIY shelves, polyurethane has got you covered. Polycrylic offers some protection against moisture, but polyurethane is the undisputed champ for waterproofing.
3. Versatility
Polyurethane comes in both oil-based and water-based options. Oil-based polyurethane provides a warm, amber tone that really makes the wood grain pop. It also dries slower, allowing more working time for tricky projects. Water-based polyurethane dries faster and has low odor and toxicity. It provides a crystal clear finish that showcases the natural color of the wood. Whether you’re Team Oil or Team Water, there’s a polyurethane that suits your needs and preferences. Adding it over polycrylic allows you to get the benefits of both finishes.
Precautions to Take
Before you go slathering on that polyurethane over the polycrylic, there are a few precautions to keep in mind:
Sanding
Some woodworking experts recommend lightly sanding the cured polycrylic layer before applying polyurethane. This isn’t just busywork; it helps the polyurethane coat adhere to the surface better. Use 220 grit or finer sandpaper to scuff up the shiny polycrylic finish gently. This removes the gloss and creates a slightly roughened surface for the polyurethane to grip onto.
Drying Time
Patience is a virtue, especially when waiting for finishes to dry and cure. Polycrylic typically dries within a couple of hours. But it reaches full cure and hardness after a few days. Rushing the polyurethane topcoat without allowing ample curing time for the polycrylic base could lead to adhesion issues. Slow and steady wins the race here.
Ventilation
Oil-based polyurethane contains volatile organic compounds (VOCs) that can harm health. As the finish dries, it releases strong fumes that need proper ventilation. Work in a well-ventilated area, wear a respirator mask, and take breaks from the fumes. Water-based polyurethane has significantly lower VOCs, but ventilating the room is still smart.
Safety Gear
Regarding safety, oil-based polyurethane is highly flammable as it contains petroleum distillates. Avoid open flames or sparks. Also wear gloves since polyurethane can irritate skin. Work carefully and cleanly to avoid accidental fires.
How to Apply Polyurethane Over Polycrylic: A Step-by-Step Guide
Here is a simple process for successfully applying polyurethane over cured polycrylic:
1. Preparation
Lightly sand the polycrylic layer with 220 grit sandpaper to remove any glossy shine. This roughs up the surface for better polyurethane adhesion. Wipe away all dust with a tack cloth. Clean the surface with a damp rag and let it fully dry.
2. First Coat
Stir the polyurethane container thoroughly before starting. Use a good quality natural bristle brush to apply the first coat of polyurethane. Maintain a wet edge and coat the entire surface in a smooth, even layer. Let the polyurethane dry for at least 8 hours.
3. Sanding
Gently sand the surface with 320 grit sandpaper once fully dry. This removes any dust nibs or imperfections in the coat. Wipe clean with a dry cloth.
4. Additional Coats
Apply additional thin coats of polyurethane, sanding lightly between each layer. Two to three coats are typically recommended for optimal protection. Always allow ample drying time between coats.
5. Curing
Let the final coat cure fully for at least 5-7 days before normal use. The polyurethane reach maximum hardness and protective abilities after full curing.
Comparison Table: Polyurethane vs Polycrylic
Here is a helpful comparison of some key traits between polyurethane and polycrylic finishes:
| Feature | Polyurethane | Polycrylic |
| Durability | High – Very durable and protective | Moderate – Decent durability for light use |
| Waterproofing | Excellent – Impermeable moisture barrier | Good – Provides some water resistance |
| UV Resistance | High – Slows wood yellowing | Moderate – Some help against UV damage |
| Ease of Application | Moderate – Brushing takes skill | Easy – Forgiving and self-leveling |
| Drying Time | Longer – 8+ hours between coats | Shorter – 2-3 hours between coats |
| Toxicity | Higher VOCs – Proper ventilation needed | Low VOCs – Safe for indoor use |
| Cost | $$$ – More expensive | $ – Very budget friendly |
As you can see, polyurethane outperforms polycrylic in most categories, especially durability and waterproofing. But polycrylic is easier to apply and dries faster. Combining both gets you the performance benefits of polyurethane with the convenience of polycrylic.
Frequently Asked Questions
1. Is the added durability of polyurethane over polycrylic worth the extra effort and time?
That depends on your project and needs. For pieces that will get heavy use and abuse – tables, floors, high traffic areas – the durability boost of polyurethane is worth the extra labor and wait times. For decorative items or lightly used furniture, polycrylic alone may suffice.
2. How does the choice between water-based and oil-based polyurethane impact the final result?
Oil-based polyurethane provides a warm amber tone and glossy finish. But it takes longer to dry, emits strong fumes, and requires mineral spirits for cleanup. Water-based poly dries faster, has less odor, and cleans up with soap and water. Both offer great protection.
3. What are the long-term maintenance considerations when using polyurethane and polycrylic?
The finishes may wear, fade, or scratch over time with heavy use. Applying renewal coats of polyurethane every few years will maintain the protective finish. Lightly sand and clean before reapplying.
4. What are the benefits of using polyurethane over polycrylic?
Polyurethane provides better durability, waterproofing, scratch resistance, and UV protection than polycrylic alone. It makes an excellent topcoat to amplify the strengths of polycrylic for long-lasting wood pieces.
5. Can you use water-based polyurethane over polycrylic?
Yes, water-based polyurethane is a great non-toxic option for going over polycrylic. It dries quickly which speeds up recoat times. Clean up is also easier with just soap and water.
6. How long should you wait before applying polyurethane over polycrylic?
It’s best to wait at least 24 hours after applying polycrylic before adding polyurethane on top. 48-72 hours is even better to ensure the polycrylic has fully cured and hardened before coating over it.
Common Mistakes to Avoid
When working with polyurethane and polycrylic, a few rookie mistakes can ruin your hard work. Here are some pitfalls to avoid:
1. Not Sanding Between Coats
Skipping the sanding steps can result in dust nibs and brush marks trapped between layers. Always sand between coats for smoothness.
2. Rushing the Process
Applying coats too quickly without allowing proper drying time can lead to bubbling, cracking, peeling and other adhesion issues over time.
3. Using Old Brushes or Rollers
Reusing an old crusty brush is just asking for trouble. Always start with a clean applicator to avoid finish contamination.
4. Working in a Dusty or Cold Workspace
Dust and debris mixing into the wet finish causes imperfections. Ideal application temperature is 70°F (21°C) or above.
5. Applying Too Much Finish
Trying to get full coverage in one thick coat will result in runs, drips, and longer drying times. Several thin coats is best.
6. Insufficient Stirring
All finishes need thorough stirring to redisperse solids and pigments before applying. Insufficient mixing leads to uneven finish.
7. Choosing the Wrong Tools
Cheap disposable foam brushes or worn rollers leave obvious application marks. Use high quality natural bristle brushes only.
8. Not Sanding Properly Before Applying
Failing to sand and prepare the polycrylic base properly prevents proper polyurethane adhesion and performance.
Tips for Using Oil-Based Polyurethane
Oil-based polyurethane produces an exquisite hand-rubbed sheen, but requires some specific handling to get great results:
1. Allow More Drying Time
Oil-based poly dries slower than water-based. Allow at least 24 hours between coats for full curing. Cool temperatures also extend drying time.
2. Mineral Spirits for Cleanup
Never dump excess oil-based poly down the drain! Use mineral spirits for easy brush cleanup. Allow brushes to fully dry before reusing.
3. Maintain Proper Ventilation
Oil-based fumes are strong and flammable. Work in a well-ventilated space away from ignition sources. Take regular breaks from the fumes.
4. Store Carefully When Not in Use
Tightly seal containers and store oil-based poly in a cool, fireproof cabinet away from spark or heat sources.
5. Use Respirator and Gloves
During application, wear a properly fitted respirator mask and chemical resistant gloves to avoid inhaling fumes or skin exposure.
6. Apply Thinner Layers
Oil-based poly levels out slower than water-based. Apply very thin coats and allow extra drying time between layers.
7. Allow 1 Month Curing Time
Wait at least 1 month for oil-based poly to fully cure before placing heavy objects on the surface or using alcohol or harsh cleaners.
8. Expect an Amber Tone
The oils create a rich, warm amber tone. Multiple coats make the color more intense. Use water-based poly for a crystal clear look.
9. Dispose of Rags Properly
Oil-soaked rags can spontaneously combust! Lay flat to dry fully before disposal, or soak in water before discarding.
Tips for Using Water-Based Polyurethane
Water-based poly also requires some specific handling techniques:
1. Shake or Stir Well Before Using
The resins and pigments can settle. Agitate thoroughly before applying for consistent results.
2. Don’t Overbrush
Water-based poly dries quickly. Too much brushing can create excess bubbles. Use smooth, even strokes.
3. Watch for Lap Marks
Water-based poly can show overlap marks without careful wet edge technique as it dries rapidly.
4. Thin If Needed
In hot or dry conditions, water-based poly can thicken and become sticky. Thin up to 10% with distilled water.
5. Allow 2 Hours Between Coats
Water-based poly dries quickly. Allow at least 2 hours between coats for proper curing.
6. Clean Hands and Tools with Soap and Water
Easy cleanup is a perk of water-based poly. Use warm soapy water before finish dries.
7. Expect a Milky Color When Wet
The resins make it appear white when wet, but it dries crystal clear. Don’t try to apply thick coats for opacity.
8. Apply in Moderate Temperatures
Cool temps slow drying time. Hot temps make application tricky. 65-75°F (18-24°C) is ideal.
9. Allow 3 Days Before Use
Let water-based poly cure at least 72 hours before placing objects on the surface or using cleaning products.
Product Recommendations
Polyurethanes
- Minwax Fast-Drying Polyurethane – oil-based, affordable, dries quickly
- Varathane Premium Fast Dry Polyurethane – water-based, low odor, dries in 1 hour
- General Finishes High Performance Polyurethane – oil-based, extremely durable
- Deft Defthane Interior Clear Satin – oil-based, contains UV blockers
- Minwax Helmsman Spar Urethane – specially formulated for outdoor use
- Rust-Oleum Parks Pro Ultra Floor Finish – high durability for hardwood floors
- Epifanes Clear Varnish – premium marine spar varnish, water resistant
Polycrylics
- Minwax Polycrylic Protective Finish – fast drying, crystal clear
- Varathane Triple Thick Polyurethane – self-leveling formula minimizes brush marks
- Zar Ultra Polyurethane – contains UV absorbers for sunlight protection
- Minwax Polycrylic for Floors – added durability for high-traffic areas
- Deft Defthane Waterborne Polyurethane – dries quickly, low odor
- Varathane Crystal Clear Floor Polyurethane – specialized for wood or concrete floors
- Krylon Kamar Varnish – contains Kamar additive for mar and scratch resistance
Brushes and Supplies
- Wooster Brush Q3211-2 Shortcut Angle Sash Brush – excellent for polyurethane application
- Purdy Clearcut Series Brush – designed to prevent brush marks
- 3M Paint Sanding Sponge – useful for smoothing between coats
- Wooster Micro Plush Lint Free Cloths – lint free tack cloths for dust removal
- 3M Safety Respirator – helps protect from oil-based poly fumes
Final Thoughts
The clear answer is yes – polyurethane and polycrylic can be combined to benefit both finishes. With proper prep and application techniques, polyurethane makes an excellent durable, water-resistant topcoat over polycrylic primer layers. Remember to be patient with dry times, work in ventilated spaces, apply multiple thin coats, and thoroughly sand between layers. Follow the safety and disposal guidelines to achieve gorgeous, long-lasting wood finishes. So grab your paintbrush and poly on!