
Have you ever walked into a room and been captivated by a piece of furniture that exudes a unique, rustic charm? Chances are, you’ve encountered the magic of flyspeck wood finish. This technique is more than just a finishing touch; it’s an art form that transforms ordinary wood into a masterpiece.
Flyspeck wood finish is a cutting-edge technique that brings a unique and sophisticated touch to any wooden surface. This innovative method involves meticulously applying tiny droplets of paint or stain onto the wood, creating a speckled pattern that resembles the intricate markings found on the wings of a fly. The end result is a visually stunning finish that adds depth and character to furniture, flooring, and other wooden fixtures.
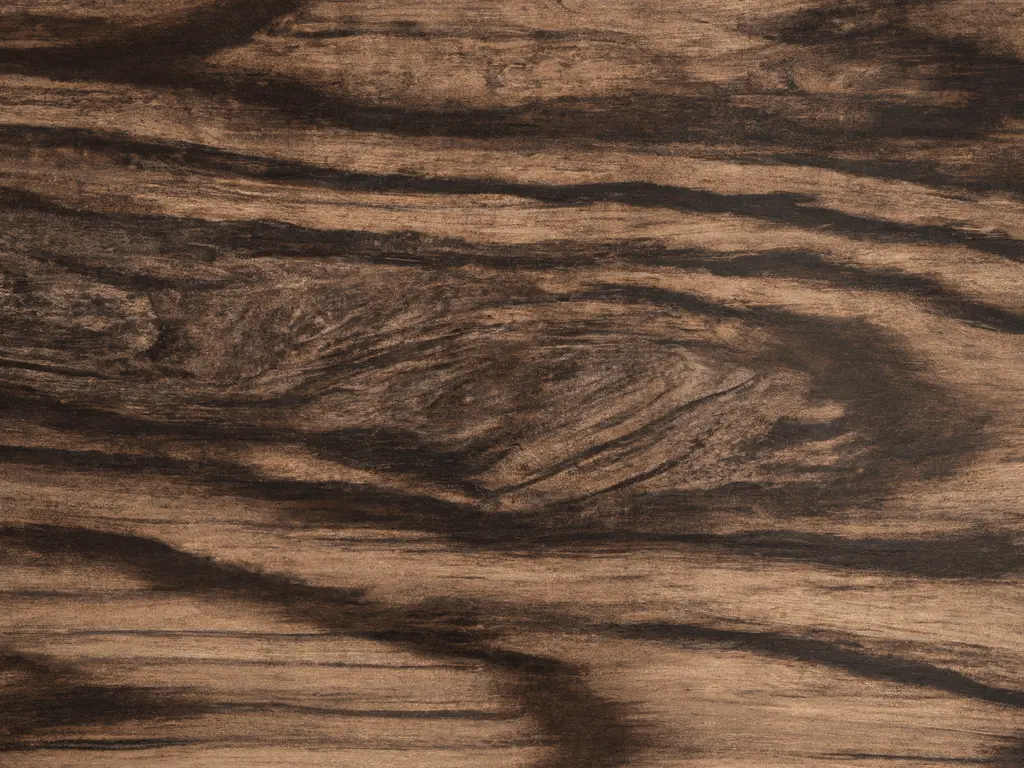
Using a combination of precision and artistry, flyspeck wood finish transforms ordinary wood into a work of art. The meticulously placed droplets create a mesmerizing effect, giving the wood a sense of movement and life. Whether used on a vintage piece or a modern design, this technique adds a touch of elegance and intrigue to any space. With its ability to mimic the beauty of nature, the flyspeck wood finish is the perfect choice for those seeking a distinctive and refined look for their wooden surfaces. This comprehensive guide delves into the world of flyspeck wood finish, its applications, and how it brings that speckled paint allure to your wooden items. So, let’s get started!
Identifying Wood Finishes: The First Step to Transformation
Before you even think about applying a flyspeck finish, knowing what type of finish already exists on your wood furniture is crucial. Why? Because not all finishes are compatible, and the last thing you want is a chemical reaction that ruins your piece. So, how do you identify existing wood finishes?
The Surface Test: Look Before You Leap
The simplest way to identify a wood finish is through a surface test. Run your fingers over the wood. Is it rough or smooth? A rough surface indicates an oil finish, while a smooth surface could mean a varnish or lacquer finish.
The Chemical Test: When in Doubt, Test it Out
For a more accurate identification, a chemical test is your go-to method. Apply a small amount of denatured alcohol to a hidden area. If the finish dissolves, it’s likely shellac. If it turns sticky, you’re dealing with a varnished surface.
Digital Tools: The Modern Approach
Today, digital tools and apps are designed to help you identify wood finishes. These tools often require you to upload a photo of the wood, and through AI technology, they can provide a close match of the existing finish.
How to Tell What Finish is on Wood Furniture: A Quick Recap
- Surface Test: Feel the texture.
- Chemical Test: Use denatured alcohol.
- Digital Tools: Utilize modern technology.
| Method | Indicators | Likely Finish |
| Surface Test | Rough Texture | Oil Finish |
| Smooth Texture | Varnish/Lacquer | |
| Chemical Test | Dissolves | Shellac |
| Turns Sticky | Varnish | |
| Digital Tools | AI Identification | Various |
The Art of Flyspecking: A Timeless Technique for a Vintage Look
Flyspecking is a fascinating technique that has been around for centuries but still holds its charm in the modern world. It involves painting furniture with tiny speckles of paint, either intentionally or unintentionally. While unintentional Flyspecking can decrease the quality of your work, intentional Flyspecking is an art form that gives each piece a vintage, rustic look. But what makes this technique so enduring?
The Concept: More Than Just Speckles
Flyspecking is not just about randomly splattering paint on a piece of furniture. It’s a calculated method that requires the right materials and techniques. The most common material is black paint, which creates a retro look. However, you can also use colors like brown or orange, especially if you’re working with a light wooden surface. The key is to create contrast; for that, you can use thinned shellac mixed with aniline dye.
The History: A Journey Through Time
Flyspeck Wood Finish, a fascinating technique with a rich history, originated in the 17th century and gained popularity in Europe during the Renaissance period. It involves applying a base coat, a mixture of black or dark brown paint and water, and flicking or splattering the mixture onto the wood surface. Initially used to imitate exotic wood species, Flyspeck Wood Finish has evolved into a beloved decorative technique that captivates and inspires.
Today, it is used in furniture making, interior design, and other decorative applications, adding depth, character, and a touch of vintage charm to any wooden surface. Flyspecking’s roots go back centuries, giving the furniture a rustic, aged appearance long before modern finishing techniques. The essence remains to create a unique, vintage look that stands the test of time.
Why It’s Still Popular: The Everlasting Appeal
The reason Flyspecking continues to be popular is its ability to transform ordinary furniture into something extraordinary. It adds character and depth, making each piece a one-of-a-kind work of art. Moreover, it’s a versatile technique that works well on wood and other materials like ceramics and even metals, although preparation may be needed for smoother surfaces.
The Toolbox for Flyspecking: Your Go-To Guide for Materials and Tools
So you’re ready to dive into the world of Flyspecking, but you’re not sure what you’ll need to get started. Don’t worry; we’ve got you covered. In this section, we’ll break down the essential materials and tools you’ll need to turn that furniture into a flyspecked work of art. Let’s get started!
Paint: The Heart of Flyspecking
The most crucial material for Flyspecking is, of course, paint. But not just any paint will do. The most commonly used color is black, providing a classic, retro look. However, if you’re working with lighter wood, you might want to consider brown or orange specks. The key here is contrast; you want the specks to stand out against the background.
Pro Tip: Thinned Shellac and Aniline Dye
If you want to experiment with colored specks, consider using thinned shellac mixed with aniline dye. This combination ensures the paint disperses into tiny droplets, giving you that perfect speckled look.
Paintbrush: Your Magic Wand
The paintbrush you choose can make or break your flyspecking project. Larger brushes cover a wider area but may produce less detailed results. On the other hand, smaller brushes offer more control but will take longer to cover the entire surface.
Alternative: The Humble Toothbrush
Believe it or not, a toothbrush can also be an effective tool for Flyspecking. It’s especially useful for smaller projects where precision is key.
Shellac: The Unsung Hero
While not mandatory, shellac can be a useful sealant before you start flyspecking. It helps the paint adhere better to the surface and can enhance the overall look of your project.
The Toolbox: A Quick Overview
| Material/Tool | Purpose | Tips and Tricks |
| Paint | Create the specks | Use black for a classic look |
| Paintbrush | Apply the paint | Choose based on project size |
| Shellac | Serve as a sealant | Apply before Flyspecking |
| Toothbrush | Alternative to paintbrush | Useful for smaller, detailed projects |
| Aniline Dye | For colored specks | Mix with thinned shellac |
The A to Z of Applying Flyspeck Finish: Your Comprehensive Guide
You’ve got your toolbox ready and eager to dive into the world of Flyspecking. But where do you start? Each step is crucial for a successful project, from preparing the wood surface to applying the final finish. This detailed guide will walk you through the entire flyspecking process, ensuring you’re well-equipped to create your vintage masterpiece.
Step 1: Preparing the Wood Surface
Sanding: The Foundation of a Good Finish
The wood surface must be prepared before you even consider applying paint. Start by sanding the surface to make it rough. This will help the paint adhere better and prevent it from wearing off over time.
Pro Tip: Choose the Right Sandpaper
The type of sandpaper you use matters. Coarser grits remove more material but may leave scratches, while finer grits will give you a smoother finish. Choose based on the condition of your wood.
Step 2: Sealing the Wood
Why Sealing is Important
Sealing the wood is a crucial step that comes before flyspecking. A good sealant, like shellac, will help the paint stick to the surface better and enhance the overall look of your project.
Pro Tip: Apply Multiple Coats
For a more durable finish, consider applying multiple coats of sealant, sanding lightly between each coat.
Step 3: The Flyspeck Technique
Choosing the Right Paint
Black paint is the go-to choice for a classic, retro look. However, consider using brown or orange specks for contrast if you’re working with lighter wood.
The Application Method
The most basic method involves flicking your paintbrush toward the wood surface. The size and density of the speckles can be controlled by adjusting your distance and angle from the surface.
Pro Tip: Use a Wire Screen for Uniformity
For a more professional look, consider using a wire screen. This will make the speckles more uniform and give your piece a more sophisticated vintage look.
Step 4: The Final Finish
Why a Final Finish?
Once your Flyspecking is dry, it’s time for the final finish. This acts as a protective layer, making your artwork more durable.
Pro Tip: Choose a Contrasting Finish
The final finish should contrast with the speckles to make them stand out. You can also add a clear sealant for extra protection.
The Flyspecking Process: A Quick Overview
| Step | Action | Pro Tips |
| Wood Preparation | Sanding | Choose the right sandpaper |
| Sealing | Apply sealant | Use multiple coats |
| Flyspecking | Flick paint onto wood | Use a wire screen for uniformity |
| Final Finish | Apply protective layer | Choose a contrasting finish |
Flyspeck vs. Other Finishes: A Comparative Guide
When it comes to finishing wood furniture, the options are almost endless. From the rustic charm of Flyspecking to the luxurious allure of gilding, each technique offers its unique aesthetic and functional benefits. But how do you know which one is right for you? This guide will compare flyspeck with other popular finishes like glazing and gilding, focusing on durability and aesthetic appeal.
Flyspeck: The Vintage Virtuoso
Durability
Flyspecking is a relatively durable finish, especially when sealed with a protective layer. However, it may not be the best option for high-traffic areas or outdoor furniture.
Aesthetic Appeal
Flyspecking offers a unique, vintage look that adds character and depth to your furniture. It’s particularly effective for achieving a rustic or antique appearance.
Glazing: The Sophisticated Stalwart
Durability
Glazing is a highly durable finish that can withstand wear and tear, making it ideal for high-traffic areas and frequently used furniture.
Aesthetic Appeal
Glazing offers a smooth, glossy finish that adds a touch of sophistication to your furniture. It’s often used to enhance the natural grain of the wood.
Gilding: The Luxurious Luminary
Durability
Gilding is less durable than both Flyspecking and glazing. It’s more susceptible to chipping and wear, making it less suitable for functional pieces.
Aesthetic Appeal
Gilding offers unparalleled luxury and opulence. It involves applying a thin layer of gold leaf, giving your furniture a rich, extravagant look.
Flyspeck vs. Other Finishes: A Quick Comparison
| Finish | Durability | Aesthetic Appeal |
| Flyspeck | Moderate, needs sealing | Vintage, rustic |
| Glazing | High, ideal for high-traffic areas | Smooth, glossy |
| Gilding | Low, not for functional pieces | Luxurious, opulent |
Final Thoughts on Flyspecking
Flyspecking is a unique and artistic technique that offers a vintage, rustic charm. It is a great starting point for DIY enthusiasts and professional craftsmen, offering a unique finish that stands out. Flyspecking requires minimal specialized tools and can be applied to wood surfaces for added durability. Experienced artisans can also offer flyspecking for custom furniture pieces or restoration projects. If aesthetic appeal is the primary concern, explore other finishes like glazing or gilding for a glossy look. Flyspecking is an art form that has stood the test of time, making it an essential addition to any DIY enthusiast or professional craftsman’s repertoire.