
Welcome to the world of lacquer for painted wood! It’s a universe with possibilities where the right finish can turn a simple piece of wood into a masterpiece. Lacquer is more than just a coating; it’s a way to enhance the aesthetics and protect the wood surface. Lacquer is vital in adding that final touch of elegance from furniture to cabinets. In this article, we’ll dive into the definition, importance, applications, and a brief overview of what you’ll discover as we explore the lacquer world for painted wood surfaces.
Understanding Lacquer: Basics and Types
Lacquer isn’t a one-size-fits-all solution. It comes in various types, each with unique features, benefits, and drawbacks. Let’s take a closer look at some of the most common types of lacquer and their properties.
Nitrocellulose Lacquer
Known for its quick-drying nature, nitrocellulose lacquer offers a glossy finish that’s hard to beat. It’s a solvent-based option that’s been a favorite for years. While it’s a shining star in the lacquer world, it has flaws. The finish can turn yellow over time, and it’s not the most environmentally friendly option.
Acrylic Lacquer
If you want a clear winner, acrylic lacquer might be your go-to. It’s water-based, making it a more eco-friendly choice. Acrylic lacquer provides a clear or colored finish, depending on your needs. It’s versatile and offers a beautiful matte or glossy finish. However, it might not be as durable as some other options.
Water-Based Lacquer
Water-based lacquer is the new kid on The Waves. Its quick-dr is water-based lacquering like its nitrocellulose counterpart but without environmental concerns. Water-based lacquer can be used for various applications, offering a clear or colored finish. It’s fresh air in lacquer but might require more coats for the desired effect.
Can Clear Lacquer Be Used on Painted Wood?
Certainly, clear lacquer can be used on painted wood, and it’s a popular choice among woodworkers and furniture enthusiasts.
Benefits of Using Clear Lacquer on Painted Wood
Enhanced Durability: Clear lacquer provides a protective layer that shields the painted wood from scratches, stains, and wear. It adds to the longevity of the wood, making it suitable for furniture and high-traffic areas.
Aesthetic Appeal: The clear lacquer’s transparent finish enhances the painted wood’s visual appeal. Depending on the type of lacquer used, it adds a glossy or matte finish, accentuating the paint’s color and design.
Sealing Properties: Clear lacquer seals the painted surface, preventing moisture and environmental factors from affecting the wood. It helps maintain the vibrancy of the paint.
Ease of Application: Applying clear lacquer is relatively simple and can be done using various application techniques. It dries quickly, allowing for multiple coats if necessary.
Methods of Applying Clear Lacquer to Painted Wood
Spraying: A spray gun is a common method for applying clear lacquer. It ensures an even coat and is suitable for large surfaces.
Brushing: A brush can apply the lacquer for smaller projects or intricate designs. It requires careful handling to avoid brush marks.
Wiping: A soft cloth or sponge can wipe the lacquer onto the surface. It’s a gentle method that works well for delicate painted surfaces.
Precautions When Using Clear Lacquer
Surface Preparation: The painted wood must be clean and dry before applying the lacquer. Any dust or grease can affect the adhesion of the lacquer.
Ventilation: Clear lacquer contains solvents that can be harmful if inhaled. Working in a well-ventilated area or using a mask is essential.
Compatibility: Not all lacquers are compatible with all types of paint. Testing a small area first ensures the lacquer does not react negatively with the paint.
Examples of Projects Using Clear Lacquer on Painted Wood
Furniture Restoration: Applying clear lacquer to painted wood furniture, such as tables and chairs, can rejuvenate the appearance and add protection.
Artistic Creations: Artists and craftsmen often use a clear lacquer to seal and enhance painted sculptures, frames, and decorative items.
Outdoor Projects: Clear lacquer can be used on painted outdoor furniture and structures, providing a weather-resistant finish.
Waterproof Lacquer Options for Painted Wood
When it comes to painted wood, especiaWaterproofing is a crucial consideration for furniture or structures; waterproofing is a crucial consideration that enhances the appearance and provides essential protection against the elements.
Types of Waterproof Lacquer for Painted Wood
Marine Lacquer: Specifically designed for marine environments, this type of lacquer offers superior water resistance. It’s ideal for boats, docks, and outdoor furniture near water bodies.
Polyurethane Lacquer: Known for its robust water-resistant properties, polyurethane lacquer is a popular choice for outdoor furniture and structures. It’s available in various finishes, including glossy and matte.
Epoxy Resin Lacquer: Epoxy resin provides a hard and durable waterproof coating. It’s often used in combination with other lacquers to enhance water resistance.
Acrylic Lacquer: Acrylic lacquers are water-based and offer good water resistance. They are environmentally friendly and come in various finishes.
Application Methods for Waterproof Lacquer
Spraying: Spraying is a quick and efficient method for applying waterproof lacquer, especially for large surfaces. It ensures an even and smooth finish.
Brushing: For detailed work or smaller surfaces, brushing allows for precise application. High-quality brushes are recommended to avoid leaving marks.
Rolling: A roller can effectively apply waterproof lacquer on flat surfaces like tabletops or benches.
Benefits of Using Waterproof Lacquer on Painted Wood
Protection Against Moisture: Waterproof lacquer seals the painted wood, preventing water penetration. It helps in avoiding swelling, warping, or rotting of the wood.
Enhanced Durability: By providing a barrier against rain, snow, and humidity, waterproof lacquer extends the life of outdoor furniture and structures.
Aesthetic Enhancement: Waterproof lacquer adds a lustrous finish to painted wood, enhancing its visual appeal. It can be chosen to match the desired glossy or matte look.
Ease of Maintenance: Waterproof, lacquered surfaces are easier to clean and maintain. They resist staining and can be wiped down with a damp cloth.
Suitable for Outdoor Furniture: A Closer Look
Waterproof lacquer is a go-to choice for outdoor furniture, offering a shield against weather conditions. Here’s why:
Weather Resistance: It protects against rain, sun, and temperature fluctuations, keeping the furniture looking new.
Versatility: Suitable for various types of wood and paint, waterproof lacquer can be used on chairs, tables, benches, and other outdoor pieces.
Customizable Finishes: From high gloss to satin, waterproof lacquer comes in different finishes to match the style of the outdoor space.
Spray Lacquer Techniques for Painted Wood
Spray lacquer is a popular choice for finishing painted wood, offering a smooth and even coating that can transform a piece into something truly special. Whether you’re a DIY enthusiast or a professional woodworker, understanding the techniques and tips for spray lacquer on painted wood can elevate your projects to the next level.
Tools for Spray Lacquer Application
Spray Guns: Professional spray guns provide precision and control, allowing for even lacquer application. They c in vlacquer application suit different projects.
Aerosol Cans: For smaller projects or DIY enthusiasts, aerosol cans of lacquer spray are convenient and easy to use. They offer a quick solution without the need for specialized equipment.
Air Compressors: If using a spray gun, an air compressor is essential to provide the pressure for spraying. It should be matched to the specifications of the spray gun.
Protective Gear: Safety goggles, masks, and gloves are essential when spraying lacquer to protect against fumes and potential skin irritation.
Methods and Techniques for Spraying Lacquer
Surface Preparation: Before spraying, the painted wood should be clean, dry, and free of dust or grease. Sanding with fine-grit sandpaper can ensure a smooth surface.
Priming: Using a primer can enhance adhesion and create a uniform base for the lacquer.
Spraying Technique: Holding the spray gun or aerosol can consistently from the surface, usually 6-8 inches, ensures an even coat. Moving in smooth, horizontal strokes helps prevent overlapping or uneven areas.
Multiple Coats: Applying thin coats and allowing each to dry before applying the next can build a durable and attractive finish. Light sanding between coats may be necessary.
Finishing Touches: After the final coat, gentle buffing with a soft cloth can bring out the shine and smoothness of the lacquered surface.
Safety Precautions When Using Spray Lacquer
Ventilation: Spraying lacquer produces fumes that can be harmful. Working in a well-ventilated area or using a spray booth with proper exhaust is essential.
Protective Equipment: Wearing a mask, goggles, and gloves protects against inhalation and skin contact with the lacquer.
Proper Storage: Storing spray lacquer in a cool, dry place away from open flames or heat sources reduces the risk of fire or explosion.
DIY Projects Using Spray Lacquer
Refinishing Furniture: Transform old or worn-out furniture with a fresh coat of paint and a glossy spray lacquer finish.
Decorative Items: Create stunning decorative pieces with vibrant paint and a clear spray lacquer coating, such as picture frames or vases.
Outdoor Projects: Protect painted outdoor furniture or planters with a spray lacquer finish to withstand the elements.
Wood Lacquer vs. Varnish: A Comprehensive Comparison
Regarding wood finishing, lacquer and varnish are popular choices; they have distinct characteristics and applications. Understanding the differences between wood lacquer and varnish can help you make an informed decision for your projects.
Properties
Wood Lacquer:
- Gloss Level: Available in various sheens, from high gloss to matte.
- Drying Time: Typically dries quickly, within 30 minutes to an hour.
- Durability: Offers good protection but may be less durable than varnish.
- Appearance: Enhances the natural color and grain of the wood.
Varnish:
- Gloss Level: Usually has a glossy finish, but satin and matte options are available.
- Drying Time: Takes longer to dry, often several hours or overnight.
- Durability: Known for its robust and long-lasting protection.
- Appearance: Can add a warm amber tone to the wood.
Applications
Wood Lacquer:
- Furniture: Often used for indoor furniture, cabinets, and decorative items.
- Artwork: Suitable for frames and artistic creations.
- Quick Projects: Ideal for projects that require quick drying.
Varnish:
- Outdoor Furniture: Preferred for outdoor pieces due to its weather resistance.
- Floors: Commonly used for wooden floors, providing a durable finish.
- Long-lasting Protection: Suitable for projects that require extended durability.
Pros and Cons
Wood Lacquer:
- Pros: Quick drying, versatile sheen options, enhances wood appearance.
- Cons: Less durable, may require more frequent reapplication, sensitive to heat and chemicals.
Varnish:
- Pros: Highly durable, weather-resistant, adds warmth to wood.
- Cons: Longer drying time, may yellow over time, application can be more challenging.
Visual Guide: Comparison Chart
| Feature | Wood Lacquer | Varnish |
| Gloss Level | High gloss to matte | Glossy, satin, matte |
| Drying Time | 30 minutes to 1 hour | Several hours to overnight |
| Durability | Good | Excellent |
| Appearance | Enhances natural wood color | Warm amber tone |
| Suitable For | Indoor furniture, artwork | Outdoor furniture, floors |
What’s the Best Clear Coat for Painted Wood? A Buyer’s Guide
Choosing the best clear coat for painted wood is a decision that can significantly impact the appearance and durability of your projects. Whether it’s a furniture, artwork, or outdoor structure, the right clear coat adds a protective layer that seals and enhances the painted surface.
Clear Coat Dixie Belle – Price: $16.95 USD
A popular choice for furniture and decorative items, offering a smooth and durable finish.
Premium SUPER CLEAR (HIGH GLOSS) 30ml – Price: $9.95 AUD
Ideal for small projects that require a high gloss finish, providing a lustrous shine.
Cabot 05-2101 Wood Protector Clear, 5 Gallon – Price: $192.89 USD
Suitable for large-scale projects, offering robust protection and a clear finish.
Premium CLEAR GLOSS 30ml – Price: $9.95 AUD
A versatile clear gloss that can be used on various painted wood surfaces.
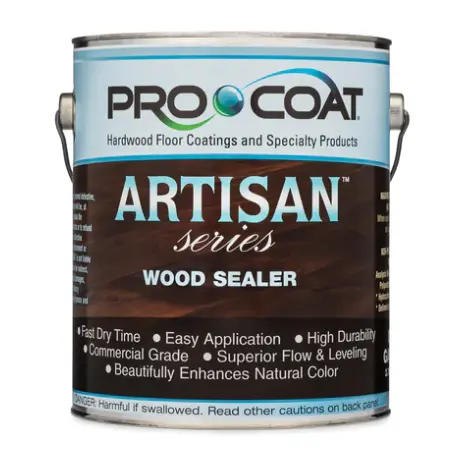
ProCoat® Artisan™ Series Wood Sealer – Price: $12.5 USD
Designed for artisans, this wood sealer offers a clear coat that enhances the natural beauty of wood.
Selection Criteria
Type of Project: Consider the size and nature of your project. Different clear coats suit furniture, outdoor structures, or small decorative items.
Finish: Choose between glossy, matte, or satin finishes based on the desired appearance.
Durability: Look for clear coats that protect against scratches, stains, and environmental factors.
Ease of Application: Consider products that are easy to apply, whether through brushing, spraying, or wiping.
Price: Balance quality and budget by comparing prices and user reviews to find a product that offers value for money.
Application Tips
Surface Preparation: Ensure the painted wood is clean and dry before applying the clear coat.
Even Application: Use appropriate tools and techniques to achieve an even coat, avoiding drips or streaks.
Multiple Coats: Apply thin coats and allow each to dry before applying the next for a durable and attractive finish.
Follow Instructions: Adhere to the manufacturer’s instructions for the best results, including recommended drying times and application methods.
Expert Recommendations
For Furniture: Clear Coat Dixie Belle is highly recommended for furniture, offering a smooth finish and reliable protection.
For Outdoor Projects: Cabot Wood Protector Clear is a top choice for outdoor structures, providing weather resistance and clear sealing.
For Artistic Creations: ProCoat® Artisan™ Series Wood Sealer is favored by artisans for its ability to enhance the natural beauty of wood.
DIY Projects: Using Lacquer for Painted Wood Furniture
Lacquer has long been a favorite among DIY enthusiasts and creative minds looking to transform painted wood furniture. Its versatility, ease of use, and stunning finish make it a go-to choice for furniture makeovers and upcycling projects.
1. Transforming an Old Coffee Table
Step-by-Step Guide:
- Clean and Sand: Remove any old finish, dirt, or grease from the table. Sand it down to a smooth surface.
- Prime: Apply a primer to ensure better adhesion of the paint.
- Paint: Choose a color that complements your décor and apply two coats, allowing each to dry.
- Apply Lacquer: Add a protective and glossy finish with clear matt lacquer. Apply two coats, letting each dry thoroughly.
- Buff: Gently buff the surface to bring out the shine.
Creativity Tip: Add stenciled patterns or decorative knobs for a personalized touch.
2. Upcycling a Vintage Dresser
Step-by-Step Guide:
- Preparation: Clean the dresser and remove any old paint or varnish. Sand it to a smooth finish.
- Painting: Select a vibrant color or a combination of shades to paint the dresser. Allow it to dry.
- Lacquering: Apply a clear lacquer to seal the paint and add a glossy or matte finish, depending on your preference.
- Decorate: Add new handles or decorative elements to complete the transformation.
Creativity Tip: Use wallpaper or fabric to line the drawers for a surprise pop of color.
3. Reviving a Set of Dining Chairs
Step-by-Step Guide:
- Clean and Repair: Thoroughly clean the chairs and make any necessary repairs.
- Paint: Choose a paint color that matches or contrasts your dining table. Apply two coats.
- Lacquer Finish: Apply a clear lacquer to protect the paint and add a professional finish.
- Reupholster: If needed, reupholster the seats to complete the makeover.
Creativity Tip: Mix and match colors for a fun and eclectic look.
4. Creating Artistic Wall Shelves
Step-by-Step Guide:
- Prepare Shelves: Sand and clean the wooden shelves.
- Paint Designs: Create patterns, stripes, or abstract designs using different paint colors.
- Apply Lacquer: Seal and protect the artwork with a clear lacquer.
- Mount: Hang the shelves on the wall, ensuring they are level.
Creativity Tip: Use stencils or freehand techniques to create unique designs.
Maintenance and Care of Lacquered Painted Wood
Lacquered painted wood adds a touch of elegance and protection to furniture and other wooden surfaces. However, maintaining its luster and integrity requires proper care and attention.
Cleaning Methods
Regular Dusting: Use a soft, dry cloth or a feather duster to remove dust and debris regularly.
Mild Cleaning: Use a damp cloth with mild soap or a specialized wood cleaner for stains or smudges. Wipe gently and dry immediately.
Avoid Harsh Chemicals: Avoid abrasive cleaners or ammonia-based products, as they can damage the lacquer finish.
Preservation Techniques
Use Coasters and Pads: Protect lacquered surfaces from hot or cold items using coasters, placemats, or pads.
Avoid Direct Sunlight: Prolonged exposure to sunlight can cause discoloration. Position lacquered furniture away from direct sunlight.
Waxing: Occasionally, a thin layer of quality wax can be applied to enhance the shine. Follow the manufacturer’s instructions.
Routine Care
Weekly Cleaning: A weekly cleaning routine helps maintain the appearance and integrity of the lacquer.
Inspect for Damage: Regularly check for scratches or chips and repair them promptly to prevent further damage.
Follow Manufacturer’s Guidelines: Adhere to the care instructions provided by the manufacturer or professional who applied the lacquer.
Dos and Don’ts
- Do: Use soft cloths and gentle cleaning products.
- Don’t: Use abrasive pads or harsh chemicals.
- Do: Protect the surface from extreme temperatures and moisture.
- Don’t: Allow spills to sit; wipe them up immediately.
- Do: Consider professional cleaning or refinishing for significant wear or damage.
- Don’t: Over-polish or wax too frequently, which can build up and dull the finish.
Expert Insights: Professional Tips and Techniques
Professional insights and expert advice can make all the difference when applying lacquer to painted wood.
Interviews with Professionals
Understanding the Wood: Experts emphasize the importance of knowing the type of wood and its characteristics before applying lacquer.
Choosing the Right Lacquer: Professionals recommend selecting the lacquer based on the project’s needs, considering factors like drying time, finish, and durability.
Proper surface Preparation: Thorough cleaning, sanding, and priming are essential steps industry experts emphasize.
Expert Tips
Application Techniques: Using the right tools and techniques, such as spraying or brushing, ensures an even and smooth finish.
Ventilation: Professionals stress the importance of proper ventilation when working with lacquer to avoid health risks.
Multiple Thin Coats: Applying several thin coats rather than one thick coat provides a better finish and protection.
Testing: Always test the lacquer on a hidden spot or scrap piece to ensure compatibility and desired appearance.
Industry Standards
Safety Guidelines: Following safety guidelines, including wearing protective gear and proper lacquer storage, is an industry-standard.
Quality Products: Professionals advise using high-quality lacquers and tools for the best results.
Continuous Learning: Keeping up with new products, techniques, and trends in the woodworking industry is essential for professionals and enthusiasts alike.
Product Recommendations: Top Lacquer Products for Painted Wood
Selecting the right lacquer product for painted wood can significantly affect your project’s final appearance and durability.
Best Lacquers for Wood Cabinets
Wood cabinets require a special touch, and the right lacquer can provide a stunning finish. Here are some top products:
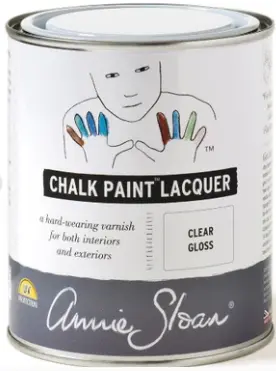
Annie Sloan Gloss Lacquer – Price: $72.0 AUD
Ideal for wood cabinets, offering a glossy finish that enhances the wood’s natural beauty.
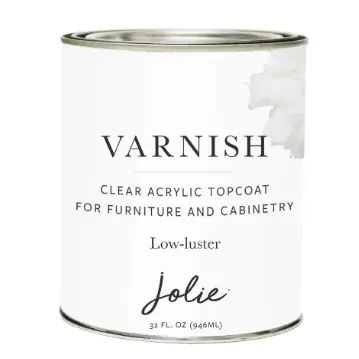
Furniture Varnish – Price: $20.95 USD
Suitable for cabinets, providing a durable and clear finish.
Application Tips: Ensure proper surface preparation, including cleaning and sanding. Apply thin coats and allow adequate drying time between applications.
Top Spray Lacquer Options for Painted Wood
Spray lacquer provides a convenient and even application. Here are some top options:
Annie Sloan – Clear Gloss Lacquer 750 ml – Price: $51.0 USD
A clear gloss spray lacquer that’s perfect for various painted wood surfaces.
Spray Techniques: Shake the can well before use, and spray in smooth, even strokes at a consistent distance from the surface.
Eco-Friendly and Sustainable Lacquer Choices
For those looking for environmentally friendly options, here are some sustainable choices:
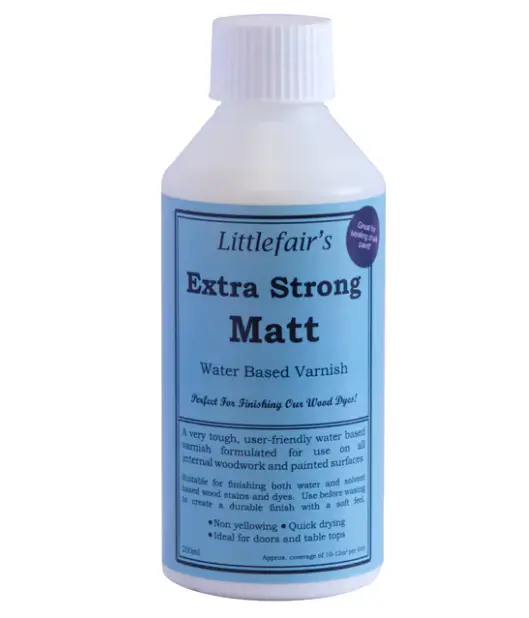
Extra Strong Varnish – Price: £15.95 GBP
A strong varnish that offers protection without harmful chemicals.
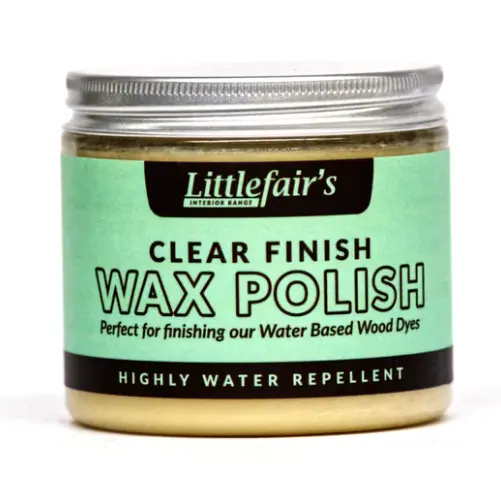
Water Repellent Wax Polish – Price: £17.95 GBP
An eco-friendly option that provides water repellency and a beautiful finish.
Eco-Friendly Features: Look for products labeled as low-VOC, non-toxic, or made with natural ingredients.
Conclusion
Lacquer is a versatile finishing option for painted wood surfaces, offering creativity, protection, and enhancement. It can be used on furniture, cabinets, and artistic creations. Understanding techniques, tips, and product choices is essential for successful lacquer projects. Proper maintenance and care ensure a long-lasting and beautiful finish. Expert insights and industry standards provide valuable insights for beginners and seasoned woodworking enthusiasts. With the right tools, techniques, and products, you can transform painted wood into masterpieces reflecting your style and passion.