
Sealing tile floors is a subject that often goes unnoticed, yet it’s vital to maintaining the beauty and functionality of your home’s flooring. Whether you’re a homeowner, a DIY enthusiast, or a professional, understanding the importance of tile sealing is essential. Why Seal Tile Floors? Tile floors are not just about aesthetics but also about protection and longevity. Sealing your tile floors helps preserve their appearance and ensure they last for years. It’s like putting a shield around something precious, guarding it from potential harm. So, why exactly do we need to seal tile floors? Let’s dive into tile protection and explore why sealing is more than a finishing touch.
Understanding the Need to Seal Tile Floors
Sealing tile floors isn’t just a fancy add-on; it’s a necessity. Imagine leaving your front door wide open during a storm. You wouldn’t do that, would you? Similarly, leaving your tile floors unsealed is like inviting trouble. It’s about safeguarding what’s underneath and keeping it intact.
Types of Tiles and Their Needs
Different types of tiles have varying needs when it comes to sealing. For instance, natural stone tiles like marble or granite are more porous and require sealing to prevent moisture and stain penetration. On the other hand, porcelain tiles might not need sealing at all. It’s like dressing for the weather; you wouldn’t wear a heavy coat on a sunny day. Understanding the type of tile you have helps determine the right sealing approach.
Benefits of Sealing
Sealing tile floors comes with a plethora of benefits. It’s like adding a cherry to a cake, enhancing its appearance and taste. Sealing provides a protective layer that guards against stains, moisture, and wear and tear. It’s not just about making the floors look good; it’s about making them last longer and perform better.
Products for Sealing
You’ll find various options in the market for tile sealing products. For example, AQUA-SEAL GOLD+ is a Premium, Low VOC, natural look, no sheen, breathable, penetrating sealer. Its NanoPlus™ Formula penetrates deeper and chemically bonds to provide maximum stain resistance against oil, food, grease, and grime. It suits porous surfaces like natural stone, porcelain tiles, terrazzo, and more. Other products like ENHANCE’N’SEAL, TileLab Surfacegard Sealer, and pH Neutral Tile & Stone Cleaner offer different features and price points to suit various needs.
Types of Tiles and Their Sealing Requirements
When it comes to sealing tiles, understanding the different types of tiles and their specific sealing requirements is crucial. It’s like knowing the ingredients before cooking a dish; each element has its unique role and needs special attention. Let’s explore the various types of tiles and how they should be sealed.
Ceramic Tiles
Ceramic tiles are a popular choice for many homeowners. They are generally glazed, meaning they have a protective layer. However, the grout lines between ceramic tiles can be porous and may require sealing to prevent moisture and stains from penetrating. It’s like putting a lid on a jar; it keeps the contents safe and fresh.
Porcelain Tiles
Porcelain tiles are known for their durability and low porosity. They are often considered less needy when it comes to sealing. It’s like wearing a raincoat on a drizzly day; it’s good but not always necessary. However, unglazed porcelain tiles might require sealing to maintain their appearance and integrity.
Natural Stone Tiles
Natural stone tiles such as marble, granite, and slate are more porous and require careful sealing. These tiles are like delicate fabrics; they need gentle care and specific treatment. Sealing natural stone tiles helps preserve their natural beauty and prevents damage from moisture and stains.
Sealing Methods and Tools
Different tiles require different sealing methods. It’s like painting a picture; each stroke and color has its place and purpose.
- Ceramic Tiles: Sealing the grout lines is often sufficient for ceramic tiles. It’s like dotting the i’s and crossing the t’s; it completes the picture.
- Porcelain Tiles: Unglazed porcelain tiles may require a penetrating sealer that sinks into the pores and protects the tile from within. It’s like sunscreen; it protects the skin from the inside.
- Natural Stone Tiles: Natural stone tiles need a specific sealer for porous surfaces. It’s like applying a nourishing cream to dry skin; it hydrates and protects.
When it comes to tools, there are various options available for cutting and sealing tiles. For diagonal tile installations, motorized wet saws make cutting easier, especially for natural stone tiles. Affordable wet saws are available for purchase or rent, making them accessible for DIY enthusiasts.
The Process of Sealing Tile Floors
Sealing tile floors is like painting a masterpiece; it requires precision, patience, and the right tools. It’s not just about slapping on a coat of sealer; it’s a step-by-step process that ensures your tiles are protected and look fabulous.
Step 1: Determine the Tile Type
Before picking up a brush, you must know what you’re working with. Are your tiles porous or non-porous? Typical non-porous tiles include ceramic or porcelain, while porous tiles are usually limestone or concrete. It’s like choosing the right attire for an occasion; you must know what’s suitable.
Step 2: Test the Grout
Grout is like the glue that holds everything together and needs special attention. Drop a few droplets of water on the grout. If they absorb into the cement grout, it needs to be sealed. It’s like testing the waters before diving in; you need to know what you’re getting into.
Step 3: Clean the Tile
Cleaning the tile is like preparing a canvas for painting; it must be spotless. Rubbing the floor in sections, use an acid substitute in a spray bottle. If you have unsealed, porous tile, avoid using water. Let the tile dry completely before moving on. It’s like letting the foundation set before building upon it.
Step 4: Apply the Sealer
Applying the sealer is like icing a cake; it needs a gentle hand and the right tools. Use an impregnator sealer to get down into porous surfaces and fill any holes. Use a specialized sealer applicator to apply the seal, and let it seep into the pores. It’s like nurturing a plant; you must get to the roots.
Step 5: Dry and Second Coat
After the first coat, let the sealer dry overnight, like letting a stew simmer to perfection. Then, apply a second coat to seal every pore and let that cure overnight. It’s like double-checking your work; it ensures perfection.
DIY vs. Professional Tile Sealing
Regarding sealing tile floors, you have two paths: Do It Yourself (DIY) or hire a professional. It’s like cooking a gourmet meal at home or dining at a fancy restaurant. Both have their merits and drawbacks.
DIY Tile Sealing
Pros:
- Cost-Effective: DIY is like a home-cooked meal; it’s budget-friendly.
- Personal Touch: You control the process, like painting your picture.
- Learning Experience: It’s a chance to learn and grow, like reading a new book.
Cons:
- Time-Consuming: It might take longer, like baking bread from scratch.
- Risk of Mistakes: Mistakes can happen Without professional guidance, like a dance misstep.
Professional Tile Sealing
Pros:
- Quality Work: Professionals provide quality work, like a chef’s special dish.
- Time-Saving: It’s quicker, like taking a flight instead of driving.
- Access to Special Tools: Professionals have the right tools, like a carpenter’s toolkit.
Cons:
- Costly: It can be more expensive, like dining at a five-star restaurant.
- Less Personal Control: You have less control over the process, like watching a movie instead of directing it.
Sealing Tile and Grout Together
Sealing tile and grout together is crucial in maintaining the appearance and integrity of your tiled surfaces. Here’s a comprehensive look at this process’s methods, benefits, and considerations.
Methods of Sealing Tile and Grout Simultaneously
- Using a Penetrating Sealer: This method involves applying a sealer that penetrates the surface, protecting it without changing the appearance of the tile or grout. It’s typically used for natural stone tiles.
- Using a Surface Sealer: Surface sealers create a protective film on the tile and grout, enhancing the color and providing a shiny finish. It’s suitable for ceramic and porcelain tiles.
- Spray Application: Some sealers come in spray form, allowing easy application. This method is often quicker but requires careful handling to avoid overspray on unwanted areas.
- Roller or Brush Application: Using a roller or brush provides more control in the application process, ensuring that the sealer is evenly distributed.
Benefits of Sealing Tile and Grout Together
- Enhanced Appearance: Sealing enhances the color and shine of the tile and grout, giving a fresh and polished look.
- Protection Against Stains: It prevents stains from penetrating the surface, making cleaning easier.
- Waterproofing: Sealing provides a barrier against water infiltration, protecting the underlying structure.
- Increased Longevity: Proper sealing prolongs the life of the tile and grout, reducing the need for frequent repairs or replacement.
Considerations When Sealing Tile and Grout
- Type of Tile and Grout: Different materials require specific sealers, so choosing the right product is essential.
- Application Technique: The application method can affect the final result, so following the manufacturer’s instructions is crucial.
- Maintenance: Regular maintenance, including resealing when necessary, ensures ongoing protection and appearance.
Effects and Characteristics of Sealing Tile
Sealing tile has several effects and characteristics that contribute to the overall appearance and functionality of the surface.
Shine
Sealed tiles often shine, enhancing the space’s aesthetic appeal. The level of shine can vary depending on the type of sealer used.
Slipperiness
Some sealers can make the tile surface slippery, especially when wet. This consideration is vital in areas like bathrooms, where slip resistance is a concern.
Waterproofing
Waterproofing is one of the primary outcomes of tile sealing. It prevents water from penetrating the tile, protecting the substrate and preventing potential damage.
Other Characteristics
- Stain Resistance: Sealed tiles resist stains, making cleaning and maintenance more straightforward.
- Color Enhancement: Depending on the sealer, it can enhance or alter the color of the tile, providing a richer appearance.
- Durability: Proper sealing enhances the durability of the tile, protecting it from wear and tear.
Products and Types Related to Tile Sealing
Regarding sealing tiles, the market is flooded with various products, each catering to different needs and preferences. It’s like walking into a candy store; there’s something for everyone.
1. AQUA-SEAL GOLD+

Price: $55 AUD
Type: Penetrating Sealer
Description: A Premium, Low VOC, natural look, no sheen, breathable, penetrating sealer. Suitable for porous surfaces like natural stone, porcelain tiles, terrazzo, and more.
Recommendation: Ideal for those looking for maximum stain resistance without altering the natural appearance of the tile.
Source: https://www.sealersonline.com.au/products/aqua-seal-gold
2. ENHANCE’N’SEAL
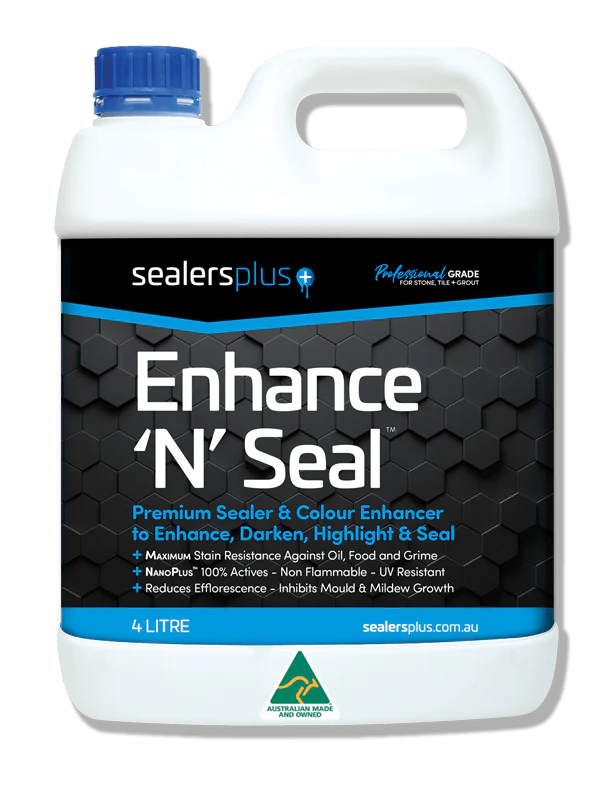
Price: $64 AUD
Type: Enhancing Sealer
Description: Designed to enhance the color and appearance of the tile while providing protection.
Recommendation: Perfect for those wanting to add a touch of richness to their tile’s color.
Source: https://www.sealersonline.com.au/products/enhance-n-seal
3. TileLab TLSGS24Z Surfacegard Sealer, 24 oz

Price: $44.78 USD
Type: Surface Sealer
Description: A versatile surface sealer suitable for various tile types, providing a protective layer on the surface.
Recommendation: A great all-rounder for those seeking a reliable, protective surface sealer.
Source: https://www.toolboxsupply.com/products/tilelab-tlsgs24z-surfacegard-sealer-24-oz
4. pH Neutral Tile & Stone Cleaner – Ready To Use Quart Trigger Spray
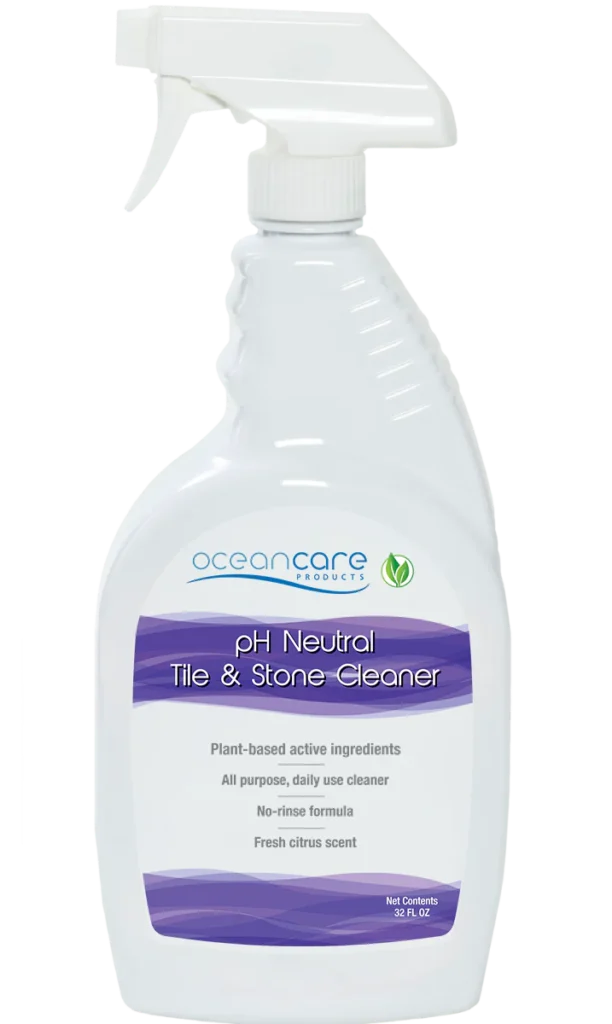
Price: $21.99 USD
Type: Tile Cleaner
Description: A pH-neutral cleaner designed to maintain the appearance of sealed tiles without harming the sealer.
Recommendation: Ideal for regular maintenance of sealed tiles, ensuring longevity and appearance.
Source: https://www.oceancarestore.com/products/ph-neutral-tile-stone-cleaner
5. Pool Tile Restorer Quart Trigger Spray

Price: $63.74 USD
Type: Tile Restorer
Description: Specifically designed for restoring pool tiles, this product helps rejuvenate pool tiles’ appearance and protection.
Recommendation: A must-have for those with pool tiles, ensuring they remain vibrant and well-protected.
Source: https://www.oceancarestore.com/products/pool-tile-restorer
Benefits and Considerations of Sealing Tile Floors
Sealing tile floors is like adding a protective layer to a precious painting; it enhances and preserves. However, like any process, it comes with its benefits and considerations.
Benefits of Sealing Tile Floors
- Protection: Sealing tiles acts like an invisible shield, protecting against stains, moisture, and wear and tear.
- Enhanced Appearance: It adds shine and richness to the tiles, like a touch of makeup that enhances natural beauty.
- Increased Longevity: Sealing prolongs the life of the tiles, like taking vitamins for overall health.
- Ease of Cleaning: Sealed tiles are easier to clean, like a non-stick pan that lets you cook without the mess.
- Value Addition: It adds value to your property, like a well-maintained garden that enhances curb appeal.
Considerations for Tile Sealing
- Type of Tile: Not all tiles need sealing. Knowing your tile type is essential, like knowing your skin type before choosing skincare products.
- Choice of Sealer: Different sealers offer various finishes and protection levels. It’s like choosing the right accessory for an outfit.
- Application Process: Proper application ensures effective sealing. It’s like following a recipe to get the dish right.
- Cost: Sealing can be an investment, so considering the cost is vital, like budgeting for a vacation.
- Maintenance: Regular maintenance ensures ongoing benefits, like regular exercise for sustained health.
Maintenance and Care After Sealing
Once the tiles are sealed, the journey doesn’t end there. It’s like adopting a pet; the care and love continue. Here’s a guide to maintaining and caring for your sealed tile floors.
Cleaning
- Regular Cleaning: Use a soft mop or cloth with a pH-neutral cleaner, like gently washing a delicate fabric.
- Avoid Harsh Chemicals: Harsh chemicals can damage the sealer, like using bleach on colored clothes.
- Spot Cleaning: Use a soft brush and gentle cleaner for stains, like treating a stain on a favorite shirt.
Care
- Avoid Scratches: Use protective pads under furniture, like using coasters to protect a wooden table.
- Wipe Spills Immediately: Quick action prevents stains, like immediately blotting a spill on a carpet.
Maintenance Schedule
- Regular Inspection: Regularly check for wear and tear, like a regular health check-up.
- Re-Sealing: Depending on the traffic and type of sealer, re-sealing might be necessary, like repainting a wall to keep it fresh.
Frequently Asked Questions
Like any home improvement task, tile sealing comes with questions and curiosities. It’s like embarking on a new adventure; you want to know the path ahead.
Do All Tiles Need Sealing?
Not all tiles need sealing. Non-porous tiles like glazed ceramic or porcelain usually don’t require sealing, while porous tiles like natural stone do. It’s like wearing sunscreen; some skin types need more protection.
How Often Should I Re-Seal My Tiles?
The frequency of re-sealing depends on the type of sealer used and the amount of traffic the area receives. Generally, re-sealing every 3-5 years is recommended. It’s like repainting a room; it depends on wear and tear.
Can I Seal the Tiles Myself, or Should I Hire a Professional?
Both DIY and professional sealing have their pros and cons. DIY can be cost-effective but time-consuming, while professionals offer expertise at a higher cost. It’s like cooking at home versus dining out; both have their charm.
Will Sealing Make My Tiles Slippery?
Some sealers might add a slight sheen, but they usually don’t make the tiles slippery. If slip resistance is a concern, choose a sealer designed for that purpose. It’s like choosing shoes; you pick what fits your needs.
What Happens If I Don’t Seal My Tiles?
Failing to seal porous tiles can lead to stains, moisture penetration, and potential damage. It’s like leaving a window open in a storm; it might invite trouble.
Can I Use the Same Sealer for Tile and Grout?
Some sealers are designed for tile and grout, while others are specific. Reading the product label or consulting with an expert can guide you. It’s like reading a recipe; you need to know the ingredients.
How Long Does It Take for the Sealer to Dry?
Drying time can vary between products, but 24-48 hours is generally recommended. It’s like baking a cake; you must give it time to set.
How Do I Maintain Sealed Tiles?
Regular cleaning with pH-neutral cleaners and avoiding harsh chemicals will help maintain the sealed tiles. It’s like caring for a delicate fabric; gentle handling ensures longevity.
Common Mistakes in Tile Sealing and How to Avoid Them
Tile sealing, while rewarding, can be fraught with pitfalls and mistakes. It’s like navigating a maze; one wrong turn can lead you astray.
Mistake 1: Not Testing the Sealer
Solution: Always test the sealer on a small hidden area first. It’s like tasting the soup before serving; you must ensure it’s right.
Mistake 2: Using the Wrong Type of Sealer
Solution: Understand the type of tile and choose the appropriate sealer. It’s like picking the right tool for the job; you must know what works best.
Mistake 3: Applying Sealer to Dirty Tiles
Solution: Clean the tiles thoroughly before sealing. Applying sealer to dirty tiles is like painting over a dirty wall; it won’t look good.
Mistake 4: Over or Under Applying the Sealer
Solution: Follow the manufacturer’s instructions for the right amount of sealer. It’s like following a recipe; too much or too little can spoil the dish.
Mistake 5: Not Allowing Enough Drying Time
Solution: Allow the sealer to dry according to the instructions. It’s like letting the glue dry; you must give it time.
Mistake 6: Using Harsh Cleaning Products After Sealing
Solution: Use pH-neutral cleaners to maintain the sealed tiles. It’s like washing silk with gentle detergent; you must care for it properly.
Final Thoughts on Sealing Tile Floors
Tile sealing is a complex and rewarding process akin to a symphony of decisions and steps. It involves understanding the need, choosing the right products, and navigating DIY vs. professional options. The benefits of tile sealing are numerous, adding value and beauty to the space. This guide is like a trusted friend, guiding you through the process with love, care, precision, and wisdom. A sealed tile floor is a canvas of dreams, crafted with care and resonating with the melody of home.