
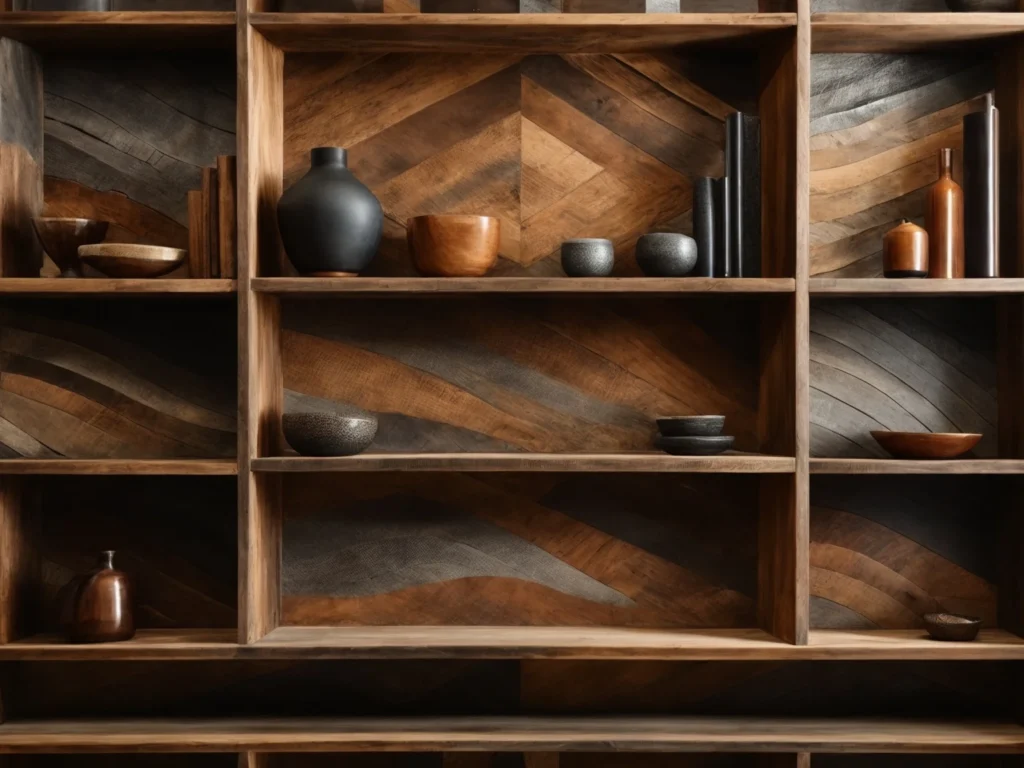
Sandblasted wood furniture combines the timeless beauty of natural wood with the modern, distressed aesthetic achieved through sandblasting. This innovative technique reveals the wood’s inherent texture by removing layers from the surface using compressed air and abrasive media. The result is furniture with unmatched character, like a weathered barn beam made modern.
In recent years, sandblasted furniture has become popular among designers and DIYers. The process allows even novice woodworkers to create stunning, unique pieces. While sandblasting does require specialty equipment, the basic principles are straightforward. With practice and the right safety gear, anyone can use this method to reveal wood’s hidden beauty.

This article will explore the ins and outs of sandblasted wood furniture. We’ll cover:
- The benefits of a sandblasted look
- Tools and techniques for sandblasting wood
- Tips for safety and containment
- How to refine your skills through practice
- When to DIY vs. hiring a professional
- Frequently asked questions
Whether you’re refinishing an old family heirloom or designing a new showstopper, sandblasting may be the perfect way to make your wood furniture stand out.
Why Choose a Sandblasted Wood Finish?
Sandblasting provides aesthetic and practical benefits, making it a popular choice for wood furniture.
The Distressed, Vintage Look
Sandblasting removes layers of material from the wood surface, creating a worn, weathered appearance. The process highlights the natural variations in the wood grain. The result is a rustic, imperfect, aged look that’s currently on-trend.
Sandblasting works especially well for replicating the distressed patinas found on antique barn beams, old floorboards, and salvaged wood. Refinishing existing furniture with sandblasting allows you to revive vintage treasures.
Texture and Dimension
As sandblasting etches away the wood surface, it brings out the subtle contours and grooves of the grain pattern. The overall texture becomes rougher and more pronounced. Sunken areas develop shadows and contours, adding dimensional details.
The tactile appeal of sandblasted wood gives furniture an authentic, hand-worked quality. Visually and physically, sandblasting enhances wood’s organic richness.
Remove Finishes and Blemishes
In addition to altering the surface appearance, sandblasting has practical uses for repairing and refinishing wood. Its abrasive force can rapidly remove paint, stain, varnish, and lacquer coatings. Sandblasting strips away residue and blemishes down to the bare wood.
It’s an efficient process for refreshing damaged, outdated, or worn wooden surfaces. Sandblasting thoroughly cleanses the wood for applying new finishes.
Customization and Creativity
With practice, sandblasting allows for tremendous customization and creativity. To create endless effects, you can control the blast pressure, media type, duration, and distance. Focusing on specific wood areas brings out striking grain patterns and textures.
Sandblasting provides a versatile foundation, whether aiming for a bold, dynamic look or something more subtle. The distressed base can then serve as the backdrop for paint, stain, engraving, or other detailing techniques.
What is the difference between sandblasting and sanding?
Regarding woodworking and surface preparation, two popular methods often come to mind: sandblasting and sanding. Both techniques have their merits but differ in various aspects, from the equipment used to the finish they provide. To help you make an informed decision, let’s delve into the key differences between sandblasting and sanding.
Table: Sandblasting vs. Sanding
| Criteria | Sandblasting | Sanding |
| Mechanism | Uses compressed air to propel abrasive media onto the wood surface. | Relies on manual or mechanical rubbing action of sandpaper. |
| Speed & Efficiency | Faster and more aggressive; ideal for removing multiple layers quickly. | Generally slower; requires more passes to remove finishes. |
| Surface Texture | Leaves a rougher, more uneven texture. | Provides a smoother, more even finish. |
| Depth of Work | Works only on the surface layer. | Can shape and smooth the actual contour of the wood. |
| Equipment Needed | Requires an air compressor and blast media. | Can be done manually with sandpaper or with a mechanical sander. |
| Safety Precautions | Additional safety measures needed to contain debris and prevent injury. | Produces less hazardous dust; simpler safety measures suffice. |
| Material Suitability | Best for stable hardwoods; not recommended for soft or thin woods. | Suitable for a wider range of wood types, including softwoods. |
Mechanism of Action
Sandblasting: This method uses compressed air to propel abrasive media, such as sand or glass beads, onto the wood surface. The forceful impact of the media scours the surface, removing paint, stains, or finishes.
Sanding: In contrast, sanding involves the manual or mechanical rubbing action of sandpaper against the wood. The abrasive surface of the sandpaper wears down the wood or finish, smoothing it out.
Speed and Efficiency
Sandblasting: If you’re looking to remove multiple layers of paint or finish in a jiffy, sandblasting is your go-to method. The compressed air allows the abrasive media to work quickly, often removing several layers in a single pass.
Sanding: This is a slower process that may require multiple passes to achieve the desired result. However, it offers more control, allowing for a more precise finish.
Surface Texture
Sandblasting: This method tends to leave behind a rougher, more uneven texture. The abrasive media physically erodes the softer grain areas, which can be a downside if a smooth finish is desired.
Sanding: Sanding, on the other hand, provides a smoother, more even finish. It’s the preferred method for projects where the final texture matters, such as furniture or cabinetry.
Depth of Work
Sandblasting: This method works by abrasion only on the surface layer of the wood. It won’t help you shape or contour the wood.
Sanding: Sanding can actually smooth and shape the wood, not just remove the surface layer. This makes it versatile for a variety of woodworking projects.
Equipment Needed
Sandblasting: You’ll need specialized equipment like an air compressor and a supply of blast media. This can make it a more expensive option upfront.
Sanding: All you really need is some sandpaper, although mechanical sanders can make the job faster and easier.
Safety Precautions
Sandblasting: Given the forceful nature of this method, additional safety precautions are necessary. You’ll need to contain the debris and protect yourself from the high-speed media.
Sanding: Sanding is generally less hazardous, although you should still wear a mask to avoid inhaling dust.
Material Suitability
Sandblasting: This method works best on stable hardwoods. If you’re dealing with soft or thin woods, you risk causing splintering or other damage due to the high air pressure.
Sanding: Sanding is more forgiving and can be used on a wider range of wood types, including softwoods.
Tools and Techniques for Sandblasting Wood
While sandblasting requires some specialized gear, the basic equipment is relatively simple and affordable. With practice, anyone can master the hands-on techniques.
Sandblasting Equipment
These are the standard components you’ll need for sandblasting woodworking projects:
- Air compressor – Provides the compressed air necessary to propel the abrasive media forcefully onto the wood’s surface. Look for portable compressors that can achieve 60-100 PSI.
- Blast cabinet – A box-like workspace made from steel or thick plywood. The inside surface needs to withstand abrasion. The front viewing window should be laminated safety glass.
- Sandblasting gun – Connects via a hose to the air compressor on one end. The other end allows loading of the abrasive media. Includes a lever trigger to control air flow.
- Face shield – Sturdy mask made from aluminum or steel with a polycarbonate window. Provides eye and face protection.
- Abrasive media – Granular materials like sand, glass bead, aluminum oxide, or walnut shells that blast from the gun to abrade the wood surface.
- Air hose – Heavy duty hose for connecting the compressor to the blast gun. Choose a diameter of at least 3/8”.
- Hand protection – Thick rubber gloves to shield hands from abrasion and vibration. Leather outer gloves also help.
Preparing the Wood Surface
Proper prep work helps ensure the sandblasting process goes smoothly:
- Remove any existing finishes, paint, etc. Strip it down to the bare wood.
- Fill any holes, cracks, or imperfections with wood filler and let it fully cure.
- Mask off any wood sections you don’t want blasted. Use painter’s tape and paper or cling film.
- Clean the surface thoroughly before blasting to prevent contamination.
Sandblasting Technique
With your equipment set up and wood prepped, you can begin blasting:
- Pour the abrasive media into the gun’s hopper according to the manufacturer’s directions. Silica sand is a common choice.
- Turn on the compressor and adjust the gun’s nozzle until you achieve the desired air pressure (60-100 PSI).
- Pull the trigger to propel the abrasive onto the wood in a concentrated stream. Keep the nozzle 6-12 inches away.
- Blast in sweeping motions to evenly rub the entire surface, overlapping.
- When satisfied with that area, move onto the next section. Let the compressor fully re-pressurize between blasting.
- Periodically pause to check your progress. Refill the gun’s hopper with fresh media as needed.
- Repeat until you achieve your desired erosion, distressing, and texture level.
Achieving Different Effects
With practice, you can create an endless variety of effects by tweaking your sandblasting methods:
- Light distressing – Use lower air pressure, finer grit, hold the nozzle farther away, and use short blast durations.
- Deep erosion – Turn the pressure up, use coarse grit, get the nozzle closer, and increase blast time.
- Localized focus – Concentrate blasting on certain areas to create unique designs and textures. Use stencils or tape to mask off sections.
- Layering – Alternate between fine and coarse grits. Do successive rounds of light and heavy blasting.
- Directed pattern – Blast linearly or use sweeping motions in specific directions to manipulate the grain.
- Color effects – Choose colored abrasive media like red garnet or glass beads for tinting the wood surface.
Experiment on scrap wood before tackling important projects. The more you practice, the better you’ll get at controlling the effects.
Safety Tips for Sandblasting Furniture
While fast and effective for abrading wood, sandblasting can be dangerous without proper precautions. Follow these guidelines to stay safe:
- Always wear head-to-toe protective gear like a respirator, heavy gloves, ear guards, and a blast suit. A full face shield is mandatory for eye protection.
- Conduct sandblasting outdoors or in a ventilated workshop. The fine dust requires ample airflow. Use dust collection if working indoors.
- Keep flammable materials like solvents and fuels away from the work area. Sparks sometimes occur during blasting.
- Position the compressor upwind from the blast site to prevent blowing dust back onto the equipment.
- Periodically vacuum the cabinet interior to clear away dust buildup. Don’t let it obstruct your view.
- Secure your workpiece firmly in place before sandblasting. Use clamps or a vise to prevent movement.
- Point the blast nozzle perpendicular to and at least 6 inches from the wood. Never aim at people or animals.
- Allow the compressor to recharge between blasting sessions fully. Drain the tank daily to prevent moisture buildup.
Put safety first, as sandblasting can cause serious eye, lung, and skin injuries without proper protection and careful handling.
Refining Your Sandblasting Skills
Like most hands-on techniques, sandblasting requires practice to achieve expert-level results. Follow this advice for honing your skills:
Master the Basics First
Focus on developing core techniques like maintaining the optimal nozzle distance and sweeping speed. Learn to uniformly abrade simple workpieces before advancing.
Experiment on Scrap Wood
Practice on cheap pine 2x4s or other scrap boards before tackling fine furniture. Test out settings and media on expendable workpieces.
Visually Assess Your Work
Make small, gradual adjustments and frequently stop to examine the surface. Compare to sample boards representing your target outcome.
Record Your Process
Note settings like media type, air pressure, number of passes, etc. Refer back to these details to recreate effects on future projects.
Consider Taking a Class
Look for workshops at woodworking stores, community colleges, or Maker spaces. Learning from an expert instructor provides valuable hands-on guidance.
Join Online Communities
Connect with other sandblasting enthusiasts on forums and social media groups. Share tips, ask questions, and get feedback.
Invest in Quality Equipment
Buy the best sandblasting rig you can afford. Cheap, underpowered compressors and flimsy cabinets cause frustration.
Enhance Your Woodworking Skills
Understand how characteristics like grain patterns, hardness, and moisture content impact results. A woodworking foundation helps ensure success.
Work on Less Visible Areas First
Blast undersides, inside corners, and backsides to get comfortable before tackling more visible surfaces.
Take Your Time
Rushing through sandblasting risks overdoing it. Go slowly and methodically until you’ve mastered control.
Patience and diligence pay off when perfecting any complex skill. Dedicate time to sandblasting experiments and practical experience. Your expertise will develop with each completed project.
DIY Sandblasting vs Professional Services
Once you understand the sandblasting process for wood furniture, decide whether DIY or hiring a pro makes the most sense:
DIY Sandblasting Benefits
- More affordable upfront cost
- Satisfaction of doing it yourself
- Creative control over the results
- Ability to sandblast at your own pace
Professional Sandblasting Benefits
- Expert skills produce flawless results
- Large workshops with ideal setups
- Ability to handle oversized furniture
- Saves time and effort
Consider DIY For:
- Small furniture pieces you can maneuver
- Simple designs with minimal fine detail
- Need to refinish your existing pieces
- Tight budget
Consider Hiring a Pro For:
- Heirloom quality furniture with intricate details
- Pieces too large to easily maneuver
- Desired results require expert precision
- Worth paying for perfection
Evaluate each project and determine if it aligns better with your DIY capabilities or could benefit from a professional touch. For most hobbyists, a combination of the two approaches is ideal.
Frequently Asked Questions
Can wood furniture be sandblasted?
Yes, sandblasting is commonly used to refinish and distress all types of wood furniture. It abrades away the surface to reveal the natural grain and texture. The wood needs to be stripped down to the bare material before sandblasting.
Does it damage the wood?
Sandblasting is an abrasive process that gradually erodes and removes layers from the wood surface. However, it doesn’t penetrate deeply enough to significantly compromise the internal structural integrity of stable, hardwood boards. Avoid excessive pressure and overdoing it to prevent potential damage.
What type of wood works best?
Hardwoods with dense, closed-grain patterns like oak, maple, ash, and walnut sandblast well. Softer open-grained woods require more caution to avoid over-erosion. Weathered, distressed barn wood is a prime candidate for sandblasting.
What kind of finish should you apply afterwards?
Oil-based varnish, polyurethane, lacquer, or epoxy resin make good protective finishes for sandblasted furniture. They help stabilize the roughened surface and prevent additional splintering.
Does it work on plywood?
Sandblasting can technically be done on plywood, but the thin, fragile veneers are prone to splintering. The multiple laminated layers also risk separating. Use low pressures and expect more uneven effects.
Can you sandblast over an existing finish?
No, sandblasting only works on bare wood. It lacks the abrasive force to penetrate existing finishes effectively. You’ll need to strip the furniture down to raw wood before sandblasting.
Conclusion
Sandblasted wood furniture offers limitless possibilities for DIYers and designers to revive salvaged wood or add artisanal flair to handcrafted pieces. While sandblasting requires research and practice, the visually striking, weathered results are well worth the effort. With the right tools, techniques, and safety precautions, anyone can learn to harness compressed air and abrasives to uncover wood’s hidden charm. Take your time, embrace the imperfections, and let the natural wood shine through.