
Applying a protective wood sealer is an important process in preserving and beautifying wood projects for outdoor use. Using the right tools and techniques when applying sealer ensures maximum performance and longevity. Pump sprayers have become popular for DIYers and professionals when staining and sealing outdoor wood efficiently and evenly.
This comprehensive guide will cover everything you need to know about using a pump sprayer for your wood sealing projects. We’ll discuss:
- Benefits of using a pump sprayer
- Selecting the right pump sprayer
- Properly preparing the wood surface
- Mixing and preparing sealers
- Pump sprayer set-up and use
- Application techniques for optimal coverage
- Cleanup and maintenance
Armed with the information in this guide, you can confidently take on any outdoor wood sealing project using a pump sprayer. Let’s get started!
Why Use a Pump Sprayer for Wood Sealing?
Pump sprayers provide several advantages over brush application when working with wood sealers and stains:
- Speed – Pump sprayers allow you to cover a large surface area much faster than laboriously brushing the sealer by hand. This saves tremendous time and labor on big projects like decks, fences and siding.
- Even coverage – The wide spray nozzle produces a consistent coat across the full application area. This prevents blotchiness and missed spots that can happen with brushwork.
- Less mess – Spraying controls overspray and drips compared to a saturated brush. Proper spraying techniques prevent runs, puddles and uneven absorption.
- Thicker application – Pump sprayers allow a thicker coating in one pass versus repeated brush coats. This provides greater water protection on the first application.
- Deeper penetration – Pressurized spraying can help push the sealer deeper into the wood pores for longer-lasting protection and color.
For efficiency, quality of finish and ease of application on outdoor wood projects, a pump sprayer is a useful tool. Let’s look now at choosing the right one.
Selecting a Pump Sprayer for Wood Sealers
There are a few important considerations when selecting a pump sprayer for applying wood sealers:
Sprayer Material
The pump mechanism and hose should be made from chemical-resistant materials that can withstand exposure to oil-based sealers and stains without degrading. Look for seals, gaskets and hoses made from Viton, Teflon or EPDM synthetic rubber at a minimum. Many cheap sprayers have components that react with solvent-based products.
Capacity
A 2-3 gallon capacity is ideal for most outdoor wood sealing projects. This provides enough volume to cover large areas efficiently while not being overly heavy or bulky. Larger 5+ gallon sprayers are best suited for commercial jobs. Make sure to select the appropriately sized sprayer for the scale of your project.
Nozzle Adjustability
Look for a pump sprayer that allows adjusting the nozzle to control spray pattern and flow rate. The viscosity of different sealers and stains varies, so the ability to optimize the nozzle for the product is important. A cone spray pattern typically provides the best coverage for applying wood sealers.
Comfort and Control
Ergonomic handles, a pressure release valve, and padded shoulder straps allow you to control spraying comfortably for extended periods. Look for a sprayer designed to maintain consistent pressure and flow during application easily.
Ease of Cleaning
Thorough cleaning is required between uses, so choose a sprayer with access ports to clean the interior components without full disassembly. Look for removable filters, drain plugs and reversible nozzles that facilitate cleaning.
Top-rated brands known for quality pump sprayers suitable for wood sealers are Chapin, Solo, and Hudson. Invest in a purpose-designed pump sprayer and it will deliver long service for all your outdoor wood care needs.
Preparing Wood Surfaces for Sealing
Proper prep work is crucial to achieving maximum adhesion and performance from wood sealers. Here are key steps to take before starting any sealing project:
Cleaning
Use a stiff bristle brush and a deck wash product to clean the wood surface thoroughly. This removes built-up dirt, mildew stains, dust and other contaminants that can prevent proper sealer bonding. Pay special attention to hidden corners and areas under railings.
Repairs
Inspect for any cracked or damaged boards, loose joinery, protruding fasteners or other defects. Repair all issues to restore integrity and appearance before sealing. Use appropriate wood fillers as needed.
Sanding
Lightly sand the wood using 80-100 grit sandpaper to “open up” the grain and allow the sealer to penetrate deeper. Be careful not to over-sand which can damage the wood. Just a quick scuffing is needed.
Removal
Vacuum all dust and debris after sanding. Use a tack cloth to pick up any remaining particles. The surface needs to be completely clean before applying sealer.
Dry Time
Allow the wood to dry out completely if any cleaning solutions were used. Wood moisture content should be below 15% before sealing. This may take 1-2 days of dry weather.
Starting with a blank canvas ensures the sealer has a solid foundation to bond to. Avoid sealing over dirt, previous layers of stain, or damp wood at all costs.
Mixing and Preparing Sealers
Always carefully follow the manufacturer’s directions when preparing an oil-based sealer or stain for application by pump sprayer:
- Properly stir or shake the sealer container before and periodically during use to maintain even consistency.
- Thin the sealer with the recommended thinning agent and volume. This improves sprayability.
- Mix multiple containers in a large bucket if needed to have sufficient volume for a whole area.
- Strain the sealer through a paint filter or fine mesh screen to catch any solids or debris.
- Allow sufficient time for any specified induction period before application. This allows proper penetration.
- Apply a test sample on scrap wood to confirm spread rate and appearance before committing to the full project.
- Only mix enough sealer that can be applied within the working time of the product.
These steps ensure the sealer is optimized for spraying application and provides maximum performance.
Pump Sprayer Set-Up and Use
Once you have the right pump sprayer and your sealer is prepped, follow these steps for proper set-up and use:
Nozzle Adjustment
Install the cone spray tip and adjust the nozzle to provide an 8 to 12 inch diameter spray pattern with a precipitation rate suited for the sealer viscosity and the wood surface.
Strain Intake
Place a paint filter or strainer bag over the intake tube to catch any solids that could clog the sprayer.
Fill Reservoir
Carefully pour the prepared sealer mix through the fill port into the tank, leaving room for pump action. Do not overfill. Replace the fill cap tightly.
Charge the Sprayer
Fully pressurize the tank by pumping the handle until it becomes stiff (typically around 15-20 pumps). This pressurizes the tank.
Test Spray
Check spray pattern and flow on cardboard. Adjust nozzle or pressure as needed.
Respirator/PPE
Put on solvent-rated respirator and any recommended protective equipment before spraying.
Spray Technique
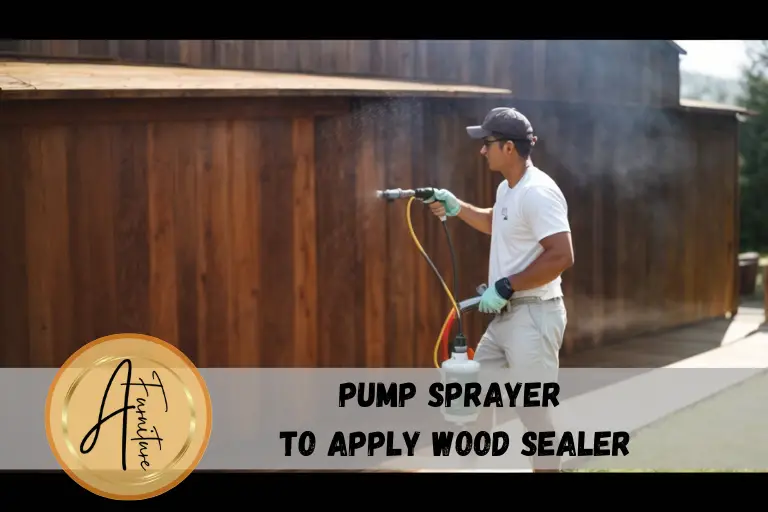
Hold the wand 12 inches from the surface and spray back and forth evenly with overlapping strokes. Maintain consistent speed and overlap. Re-pressurize tank as needed.
Proper set-up and careful spraying will deliver a professional finish with even coverage and no drips. Let’s look closer now at application methods.
Application Techniques for Optimal Coverage
Applying the wood sealer takes some finesse to get full coverage without creating drips or runs:
Directionality
Apply sealer along the direction of the wood grain for best penetration. On vertical surfaces, apply from top to bottom.
Overlap
Use a 50% overlap with each pass of the spray wand to ensure no gaps are left in the coating. Mark your progress or use guide strips.
Distance
Hold the spray wand about 8-12 inches from the wood surface. Closer risks runs, farther results in overspray.
Thin Coats
Apply two thin sealer coats rather than one thick coat for best penetration and evenness. Let the first coat fully dry.
Back-brushing
Consider “back-brushing” behind the spray wand using a brush to smooth out drips and work sealer into the grain.
Vertical Edges
Use an angled spray pattern and light coats on vertical edges and surfaces to avoid sagging. Brush these areas for best control.
Between Coats
Follow recoat times specified by the sealer manufacturer. This allows proper drying between coats.
Weather Conditions
Avoid sealing in direct sun, high winds or high humidity. The sealer can dry too quickly leading to poor adhesion or trapped moisture. Optimal conditions are typically early morning with low humidity and dew.
Maintain Pressure
Re-pressurize the tank as needed to maintain consistent spray pressure and flow rate. This ensures an even coat.
Multi-Directional
Vary the spray direction to coat all sides of vertical boards and 3D details. Go against the grain periodically.
With attention to detail on these techniques, you can achieve results free of drips, light spots and runs. It just takes a little practice and perseverance! Now let’s discuss clean-up.
Cleanup and Maintenance
Thorough cleaning is essential both during and after using a pump sprayer with solvent-based sealers:
- Periodically filter intake – Place a new paint filter over the intake tube every 5-10 minutes to catch any solids that could clog the sprayer.
- Rinse between coats – Rinse the sprayer with solvent between sealer coats to prevent dried accumulations inside the pump and hoses. Use the solvent recommended by the sealer manufacturer.
- Clean spray tip – Use a soft brush and solvent to remove any sealer buildup on the spray tip between coats. Clogging can affect the spray pattern.
- Rinse after use – Thoroughly rinse all components with solvent immediately after completing the application while sealer is still wet.
- Flush with solvent – Fill the tank about 20% full with solvent and spray it through the nozzle until the discharged liquid runs clean. Rinse all internal parts.
- Remove filters/tips – Remove filters and soak in solvent along with nozzle tips and caps. Clean fully.
- Lubricate seals – Coat o-rings and seals with non-petroleum grease or lubricant to prevent drying and sticking.
- Wipe exterior – Use solvent on a rag to remove all exterior sealer residue from the pump sprayer body and handle.
Proper cleaning and maintenance will keep a pump sprayer running smoothly for years. Follow manufacturer’s recommendations for any unique cleaning needs of the sprayer model.
Final Thoughts
The pump sprayer is a great tool that makes applying protective wood sealers faster, easier and more consistent. Following the recommendations in this guide will help you select the right pump sprayer, properly prepare surfaces, achieve professional-quality application and keep your sprayer in working order.
Some final tips for success:
- Always read and follow sealer manufacturer instructions
- Test product compatibility before spraying
- Use fresh filters and strainers with each application
- Maintain consistent pressure and speed when spraying
- Work in proper ambient conditions
- Allow ample dry times between coats
- Clean thoroughly after every use
With some practice, you can master wood sealer application via pump sprayer. Your outdoor wood projects will look their best and be protected from the elements using these techniques. Enjoy the beauty and satisfaction of creating durable wood projects sealed to perfection!